Wednesday, December 31, 2008

Happy New Year!


Today we are going to my brothers house where a small gathering of 23 people will party until the sun comes up!

A very Happy and Healthy New Year to everyone!

Lemon Tuscan Pasta with Herb Crusted Chicken


One of my favorite things to do is to figure out recipes from restaurants. Years ago, I used to work as a hostess at a local Houlihan's. My friends and I loved that place, so much that we ALL started working there! They used to have this one dish that we all loved, one of my friends, Yelena, would probablly have that dish as her last meal! She has been begging me to make this for her and I still keep promising her I will. I am just hoping that maybe this simple version of the dish will inspire her to make it on her own!

This pasta was creamy, lemony and very filling! It was one of our saddest days when they took it off the menu. So being the only cook out of all my friends, I decided to duplicate it. About 6 years ago I did it, I replicated the recipe. But it wasn't exactly the quickest thing in the world. Today, with the help of my favorite friend, Trader Joe, I was able to make a very quick and satisfying meal. With a few fresh ingredients I am able to wake up the flavors and make the sauce my own. Unfortunately, it's not the most diet friendly, so I threw in some whole grain pasta with flax seed to make up for the sauce.

*Ruth from Presto Pasta Nights will be hosting this recipe on her site! Check it out!*

Lemon Tuscan Pasta

1/2 pound spaghette or angel hair pasta
1 jar Trader Joes Alfredo Sauce (you can also use homemade if you have it)
2 tablespoons butter
3 cloves garlic, minced
1/2 an onion, finely diced
1/4 cup good Parmasan Cheese
zest off of 1/2 a lemon
juice of 1 lemon

1. Bring a large pot of water to a boil for pasta.
2. Once the water has come to a boil, start the sauce. On a very low flame add butter to a deep saute pan. Once butter melts add garlic and onion. Close lid and let the onion and garic "sweat" in the butter. You do not want any color on it. It needs to go very slow and just develop the flavors. *The smell of butter cooking with onions and garlic, has to be the best smell in the world! When my fiance' walked into the house and got a whif he was instantly excited about dinner!*
3. Once garlic and onions are translucent and very fragrant, add in your sauce and lemon zest. Scrape every bit of the sauce in, it tends to get stuck in the jar. Let it simmer just enough to get thick. At the very end add in the cheese and lemon juice. *Be very careful with the lemon juice! Do not add any acidity to a cream sauce while it is boiling. It will seperate and you will have a big globby mess! Add it in slowly, at the end.*
4. Once the pasta is done, add it to the sauce with tongs. Don't worry about the water from the pasta, it will combine nicely with the sauce.
5. Serve with a twist of lemon and a sprinkle of Parmasan Cheese on top.

Herb Crusted Chicken


2 lbs of chicken breast
seasoned Italian bread crumbs
1 egg
1 handful of Italian Parsley, finely chopped
zest off of 1 lemon
Olive oil to fry

1. Remove fat from chicken breasts. Cut the chicken breast in half horizontally. I hate pounding out chicken breasts, it scares my cat and frankly just makes too much noise. Instead, I just cut it in half and they get thin that way at the same time they make more portions.
2. In a plate, combine breadcrumbs with parsley and lemon zest.
3. In another plate scramble one egg with 1 tablespoon of water.
4. Preheat the pan on high and pour enough oil in the pan to come up about half way on the chicken.
5. Dip the chicken in egg and then in the breadcrumbs.
6. Fry until golden brown on each side. Lay out on paper towels to drain the fat.
7. Serve with a sprinkle of parsley.

Tuesday, December 30, 2008

Roasted Vegetable Lasagna


Between last week and this week I have been all screwed up with my meals! Because of the short weeks, it's tough to figure out what I should make for the week to eat. I was craving pasta like crazy, but wanted to keep it healthy. So I decided to go for lots of veggies and less pasta. I took the help where I could get it and used canned marinara sauce from Trader Joes, it tastes really great and has no additives in it. I had some frozen spinach and some of Trader Joes roasted eggplant and zucchini left over in the freezer. I cleared out some veggies I had in the fridge and roasted them up in the oven. I used Sargento 6 Cheese Blend with Mozzarella, Provolone, Parmesan, Fontina, Romano and Asiago. I did not have to use much and because of the Asiago and Parmesan it formed a beautiful crust on top.

It was actually very easy to eat this without feeling guilty! Typically I won't eat lasagna because it is loaded with fat and calories. But with this one, I did not put a thick coat of cheese on top and there was more veggies than pasta. I did use a lot of ricotta but that's a whey protein which is actually very good for you! It's also a really great way to get picky kids or a picky fiance', who doesn't like veggies, to eat plenty of vegetables, without them knowing it!
I gave it to him for lunch the next day and he called me up and said,
"Look babe, I expect a lot out of you with your cooking, but this was top notch! Restaurant quality! I don't even like lasagna! But this yum!"

To that I replied, "Well good, I'm glad that my $50,000 education didn't go to waste and I could still make restaurant quality lasagna!"

Roasted Veggie Lasagna

1 red onion, cut into large wedges
1 yellow pepper, cut into large chunks
1 red pepper, cut into large chunks
1/2 a package of Trader Joe's Grigliato Misto, or roast your own eggplant and zucchini
10 oz package of frozen spinach, defrosted
2 garlic cloves
2 tablespoons fresh basil, chiffonade
lasagna noodles
1 jar of marinara, store bought or homemade
12 oz ricotta cheese
1 bag of shredded cheese, about 2 cups
1 table spoon olive oil
salt and pepper to taste

1. Place cut up onion and peppers onto a sheet pan coated with olive oil and seasoning. Roast at 450 degrees until lightly brown in color, about 20-25 minutes.

2. Take vegetables out of oven and place in the freezer to cool them quickly. You don't need them cold, just cool enough to handle with your hands.
3. Cut up the roasted veggies into small pieces, including zucchini and eggplant. This is no place to get exact with your knife skills, just run your knife quickly through all the veggies.
4. Toss all roasted veggies with garlic and basil and preheat your oven to 350-degrees.
5. Take a 9X9 pan and coat it with pan spray.
6. Coat the bottom with a layer of marinara sauce.
7. Put a layer of lasagna noodles on the bottom. *A lot of stores now carry the lasagna noodles that don't need to be precooked in water. They are much easier to handle when they are not cooked and make it a much faster process.*
8. Place a layer of ricotta on top of the noodles. It does not need to be perfect, just use your hands to crumble it up, it will melt in the oven anyhow.
9. Place a nice layer of roasted veggies and spinach on top of ricotta. Don't be shy with the veggies.
10. Sprinkle an even layer of shredded cheese on top.
11. Repeat this until you get to the top.
12. Place in the oven, until the top gets brown in color, about 45 minutes.
*This lasagna is unique because of the crust formed on top from the cheese combination. Most other lasagnas tend to be gooey on top. This one has a really great combination of both gooey in the middle and crispy on top*

Monday, December 29, 2008

White and Dark Chocolate Bread Pudding


I love bread pudding! I always have! It's comforting, easy and always a crowd pleaser. At least it always was with my clients. This was the first time that I made bread pudding for my family and friends. My God, the faces I got when I started serving this up to them! They looked at me and we're all like, "Umm no thanks, we'll pass on that." I was like, "No, this is good, try it." They all waived their heads "no" in unison. So I shoved a spoonful into my best friend Marina's, mouth, and she was like, "Oh my God! This is amazing...wow!" And then they all joined in!

I don't remember where I got this recipe but I tweeked it a lot. To the point where now, it really is my recipe. I served it up with plain whip cream out of the bottle. I forgot to buy whipping cream so I had no time to make my own. I also just had some last night and I put it together with vanilla ice cream. It was delicious!


White and Dark Chocolate Bread Pudding


1 loaf of Hawiian Bread
6 ounces bittersweet (not unsweetened) or semisweet chocolate, chopped
6 ounces imported white chocolate, chopped
4 large eggs
1/2 cup plus 4 tablespoons sugar
2 teaspoons vanilla extract
2 cups whipping cream
1/2 cup whole milk
Nonstick vegetable oil spray


1. Combine bread, chocolate, and white chocolate in large bowl and toss to blend.
2. A hand whisk, beat eggs, 1/2 cup plus 2 tablespoons sugar, and vanilla in another large bowl to blend. Gradually beat in 1 1/2 cups cream and milk.
3. Add cream mixture to bread mixture; stir to combine. Let stand 30 minutes.
4. Preheat oven to 350°F. Spray 13x9x2-inch glass baking dish with nonstick spray.
5. Transfer bread mixture to prepared dish, spreading evenly. Drizzle with remaining 1/2 cup cream. Sprinkle with remaining 2 tablespoons sugar.
6. Bake the pudding until edges are golden and custard is set in center, about 1 hour. Cool pudding slightly.
*I actually cooked the bread pudding for 30 minutes the night before. Then on the day of the party I stuck it into the oven while we were having dinner. By the time we were ready to eat dessert, the chocolate was all gooey and melted!*

Not So Green, Green Beans

I love green beans but I think that somewhere along the line, they been given a bad name. Maybe because people associate them with those disgusting looking brown things they always see at buffets. YUCK!
Well these green beans not called "not so green" because of the color you can be sure of that! By "not so green" I mean that they aren't quite as healthy as they should be. The addition of sauteed bacon and shallots makes this old veggie a huge crowd pleaser! I often find that the guys are usually the ones that don't eat the veggies. But as soon as they all heard BACON, they attacked the green beans!
This recipe was actually requested by me cousin, so here you go!


Not So Green, Green Beans


1 Bag of Trader Joes Frozen Green Beans
7 shallots, sliced
8 slice of bacon, cut into small pieces
Olive oil
Salt and Pepper

1. Place bacon pieces into pan and sautee to render fat.
2. Once fat has rendered, remove the bacon with a slotted spoon and add in shallots. Sautee on medium high heat, until golden brown and soft, about 10 minutes.
3. Add green beans and cooked bacon pieces. Season with salt and pepper and serve.
*If you are making this ahead of time like I did. Do steps 1 and 2 and then put it in the fridge. Once you are ready, throw them in the pan, add green beans and they will taste like you have been slaving at them all day!*

Golden Potatoes


Everyone loves potatoes in our family! EVERYONE! I can have 15 different potato side dishes and they will all get eaten! Every year I look for something different when it comes to potatoes. Earlier this year, my fiance's mother made these amazing little potatoes. When she initially placed them on the table, they looked like little pastry puffs more than anything else. No one even knew that they were potatoes. That's the beauty about them they are super easy to make but impress all!

Now I will be honest, I don't have a recipe. But this is super easy!
You want to peel the potatoes and make sure they are no smaller than a golf ball and no bigger than a tennis ball. (Obviously they shouldn't be round but at least this can give you an idea of how big they should be). I usually figure about 4-5 potatoes per person, they go FAST. Place the potatoes in a pot full of water and for every gallon of water use 1 tablespoon of Kosher Salt. *The salt is why the potatoes brown so beautifully in the oven , so make sure you put it in*
Take out two of your racks out of the oven and preheat it to 450-degrees. As soon as the potatoes reach a boil, dump them onto a collander and then line them up on the racks. (This was the reason you don't want them too small, because they will fall through the racks.) Stick it into the oven for about 15-20 minutes. You will know that they are done once you see the beautiful golden brown color! Serve immediately to the table.
*Please note, if you are making these ahead of time, just take them out of the oven once they are ready and let them stay on the racks. Right before service, stick them back in the oven and allow them to crisp up again and they will be ready for you!*

I served these up with a very simple butter mixture. I took some melted butter and combined it with freshly grated garlic, salt and pepper. Serve it in a seperate bowl and tell your guests to crack open the potato with a fork and then drizzle the buttery goodness all over the potato!
That's it! Easy and all your guests will think this took you hours to make!

Citrus and Herb Turkey


I will confess something...I never made turkey before...EVER...before this Thanksgiving that is. I mean sure I made turkeys at a catering kitchen and I rubbed them down with butter and stuck them in the oven. But I never actually watched cooked it from beginning to end and it certainly wasn't for my loved ones.
This year I decided that I am making Thanksgiving MY holiday! So I researched recipes, most importantly of all...the turkey. Turkey is one of those things that we always did in my family, but it was just there...by some miraculous fluke it sometimes tasted great...but it was never WOW. So I decided to make it WOW! Now I understood what a huge task I was taking on right from the start. Most people in the family aren't even turkey eaters so I would have to overcome their previous notions of dry, icky turkey...

Right around Halloween I started planning my menu and my search for the perfect turkey began. Everything from marinading to salting to deepfrying...I read it all. But nothing really struck me as the perfect turkey. Until one day I saw it...BRINED TURKEY...Alton Brown was my savior! I was watching the food network as usual and there he was with a turkey show!
Brining: Brining makes cooked meat moister by hydrating the cells of its muscle tissue before cooking, via the process of osmosis. There it was! Science! How can this be wrong! It can't! It's perfectly logical and Alton said it works! So it certainly must!
So finally the right prep method was decided on.

Next came the flavors. I really tried to keep it simple. Lots of citrus and herbs just to enhance the flavors of the turkey. That's it, nothing fancy, I didn't want to cover the flavors just enhance and sweeten them.

Finally, I had to figure out the cooking process. There are SOOOO many different ways to cook a turkey in the oven. But based on all the cooking that I did in professional kitchens there is only one way to go: start high then go low.
What does that mean? Well you want to start out high to get the breast nicely browned and golden. Then you turn it down and let the rest of the turkey cook. This will guarantee a golden, crispy crust and a tender juicy inside.

That was it! Now that all the variables to a perfect turkey were complete, I was ready to cook!


I used Alton Brown's recipe for the actual porportions of salt to water as well as the cooking method. I definitley tweeked the brine recipe as well as the aromatics.


Perfect Citrus Turkey

Brine
14 to 16 pound frozen young turkey
1 cup kosher salt
1/2 cup light brown sugar
1 tablespoon black peppercorns
zest of 2 oranges
zest of 2 lemons
3 tablespoons chopped rosemary
2 tablespoons chopped tyme
2 tablespoons chopped sage
1 cup orange juice
2 gallons heavily iced water

1.Combine all the ingredients in a large plastic bag, I used a garbage bag.
2.Place the thawed turkey breast side down in brine. I used a pot for this turkey, because it was small enough.
3. Cover the turkey and refrigerate for 8 to 16 hours, turning the bird once half way through brining. I used my garage as a storage space since it is so cold out now.

Turkey
1/2 cup vegetable oil
1 tablespoon chopped rosemary
1 tablespoons chopped tyme
1 tablespoon chopped sage
zest and juice of one orange
zest and juice of one lemon
2 cups of chicken stock

Preheat oven to 500 degrees F.

1. The next day, remove the turkey out of the brine and rinse it inside and out with water.
2. Tuck the wings underneath the bird and place on a roasting rack on top of a sheet pan or roasting pan.
3.Combine all the ingredients, except the water and brush on the oil and herb mixture. Make sure you get the breastside as well as the underside. Get into all those little nooks and crannies, you want every piece of this turkey to taste wonderful!
4. Fill the cavity with the oranges and lemons that were juiced and zested.

5. Before placing it in the oven, take a piece of foil and measure it on the bird into a little triangle. You want it to just cover the breast. Place the triangle to the side, it will be used a bit later on.
6. Place the turkey onto the lowest rack in the oven and let it roast for 30 minutes and 500 degrees. NO PEEKING! Because it is roasting on such a high temperature, all the juices that fall into your roasting pan may evaporate off and start to burn. During this time you want to add in your chicken stock just a bit at a time, so that your bits don't burn. This can be done throughout the entire cooking process to prevent the bits from burning and leaving perfect pan juices for a gravy.
*One of the easiest way to make an roast perfect is an internal probe thermometer. Especially one that you can set the temperature alarm on. It makes life simple and your roast moist! All you have to do is stick in the thermometer and wait for the alarm to go off!*
7. After the first half hour, take out the turkey and cover the breast with your pre-measured foil.

8. Insert a probe thermometer into thickest part of the breast and reduce the oven temperature to 350 degrees F.
9. Set your probe thermometer alarm to 151 degrees F and walk away. (A 14 to 16 pound bird should require a total of 2 to 2 1/2 hours of roasting.)
10. Once it's done, remove it from the oven and let it rest for about 15-20 minutes, covered with foil.
11. Carve and serve!
*I always carve my turkey before I serve it to the guests. This actually enables me to make the turkey hours before they get there. That way, I can carve it, stick it into a sheet pan, cover with foil and reheat in the oven right before the guests get there. In case anyone wants to see what my turkey looks like before I cut it, I take pictures for proof! Alton Brown has an awesome video here on how to properly carve a turkey. By carving the breast this way, you get a much moister turkey breast.*

Now, the gravy. The pan drippings from this turkey were really wonderful so the gravy is really simple. Just make a rough with a bit of the fat from the pan drippings and some flour. Slowly pour in some white wine and the turkey juices (no fat). Add in seasoning and some chopped fresh herbs. Heat up when ready to serve and you're done!

Post Hannakuh


(That's me, shaking up the whip cream!)

Well Hanukkah dinner went over smoothly. Except I think my guests have been spoiled by all my elaborate dinners before this one. This was one of the few times where I wanted to make a nice small intimate dinner for 10. And so I did. However, even with all the food on the table: Turkey, Potatoes, Potato Pancakes, Salad, Green Beans, Bagels and Lox, SOME people were a bit shocked that this was IT. Fortunately, those SOME people, well actually, that ONE person, was my fiancee and his comments don't count anymore. I made my Crispy Potato Pancake, I learned a few things that should not be done with this type of pancake to preserve the moisture and texture. I wanted them to be extra crispy and because of that I think I put in too thin a layer on the pan. My best friend, Marina, had a few comments to put in (as she always does), complaining that they were too thin and that her babushka made them yummier. Well I said, "Your babushka also fries them in oil and butter. And my dear, you have a wedding dress to put on in 6 months!" That fortunately shut her up real quick!
The turkey was a huge hit, as it was on Thanksgiving! Martinis were drunk, games were played and people fell asleep on the couch! All in all: a successful Holiday!

Wednesday, December 24, 2008

Prepping for Hanukkuh and Other Holiday Gibberish

Yesterday was quite the day for me! Firstly, it is literally a winter wonderland in Chicago. Driving was awful and all the stores were packed, even the grocery stores! Today is no different, we are expecting an additional 4-6 inches of snow today, it really will be a White Christmas and a White Hanukkah!

Whenever I have a larger party to prep for I always do all my leg work ahead of time. It saves me a ton of time as well as headaches on the day of the party. All the chopping, marinading, baking and setting the table usually happens the day or 2 before (with a few exceptions). I never have to worry about the little things going wrong and I get to actually enjoy myself when people start coming over. On Thanksgiving I had 18 people at my house and I was done cooking and setting up by 3pm! My turkey was even ready by 4pm! All my guests started coming in at about 6pm and by that time everything was warming nicely in the oven.

Holidays should be fun and warm, not stressful and hectic! When I was a kid, I watched my mom and grandma prep for holidays for 2 days. I never understood why! Then when I got older and started doing my own holidays, I saw why my mom did everything up to two days before! It's a LOT of work to do a big party! It's even MORE work to do a party when you are Russian. Russians, have more of EVERYTHING! More food, more courses, more liquor and more dessert. You see, with Russian style eating it is more of a marathon than a sprint. Eating must be done over several hours and the key is to pace oneself...otherwise you will be out on the couch before the second course even hits with people calling you a wussy!

Our family get togethers are intense! My family is loud and my fiance's family is even louder! So when we all get together it is like one big tone deaf choir, all talking fast and loud in different pitches and tones! I always tell new guests to bring a pair of ear plugs with them, just in case. They all ALWAYS crowd around in the kitchen and naturally get in my way and try to taste a bit of everything, eventually I push them all out into the dining room. My nieces and nephews run around and squeal at the top of their lungs trying to catch my poor cat. And my fiancee...well he always finds this as the perfect time to hop in the shower, leaving me to handle the family all by myself! Half of the guests are always late the only exceptions being, my brother and sister-in-law, my fiance's parents and my brother's in-laws. After that the countdown begins...about 15 minutes AFTER we scheduled the together my aunt and uncle stroll in...15 minutes after that my fiance's brother and wife come with their kids and the final arrival is by my cousin and her husband crossing the line at an astounding 45-60 minutes after the scheduled time! I learned my lesson the first time and this is why now I tell people to come over about 30-40 minutes before the time I plan to serve. It gives everyone a chance to chill out, smoke and gather before we sit down.

Now on to the food. I am a control freak when it comes to the holidays! The food has to be done my way or else I know it will be screwed up! So I usually tell people to bring stuff that I don't want to make or that they can buy. For instance, I told my cousin to bring her usual Knorr's spinach dip (It is delicious, simple and not even the cooking challenged can mess this one up) and homemade cranberry sauce. My sister-in-law brought me Spanokopita, delicious little filo triangles with feta and spinach inside, store bought and delicious! (FYI, Cosco has the best ones and they are extremely affordable!) My fiance's mother is the baker. I always tell her to bring one dessert and she always brings 4! She also brought these amazing golden potatoes that everyone loved! (I may be making them tonight and if I do, I will definitely post the recipe!)

I really love our holidays together because I get to play around with the menus! For instance, for Thanksgiving there will of coarse be a turkey with some sort of potatoes and veggies, but that's pretty much the only constraints for food I have to stay with. Generally there are really 3 rules to a Russian dinner, no matter what the holiday is:

1. There must always be plenty of liquor on the table (vodka, tequila, cognac and wine...a bit of everything to please every one's tastes)...
2. There must always be pickled veggie and sometimes fruit on the table.
(This year we had my grandmother famous pickled tomatoes! I am still working on getting the recipe from her! We also had pickled watermelon, cantaloupe and honeydew. Trust me, I am a picky eater but this is just sooo darn good! Don't knock it till you tried it!)
3. There must be an abundance of food...good, filling food. (To absorb all that liquor of coarse!)

The first course is always almost like an antipasti course. Really yummy deli meats and cheeses, pickled veggies, little compound salads, deviled eggs, pate, caviar and for the first time this year I did roasted garlic cloves to be used as a spread on rolls instead of butter! It's almost like little Amuse Bouches , just enough to get the taste buds going. The second course is hot appetizers. This year I went a bit heavy on the appetizers! My fiance's mom warned me, "On Thanksgiving, don't do a lot of hot appetizers no one will eat the turkey..." But she was wrong! Once the appetizers started coming out...the guests eyes started widening...first came my Secret Stuffed Mushrooms, then those Golden Potatoes, then the Spanokopita, then Eggplant Rolls (stuffed with ricotta and marinara) then a Wild Mushroom and Potato Augratin. After this everyone kinda looked at me and said, "Are we eating the turkey tommorrow? Because no more food can fit." So they took a break. When they came back there was a new spread on the table: the Turkey, with Buttermilk Mashed Potatoes, Not so Green Green Beans and this amazing Russian rice dish called Plov (I will provide the recipe once I decide to make it again). Everyone freaked out when they saw the spread. But they ate! They ate a LOT! I don't think my family has ever eaten quite so much food! I never thought I would say this: they were full, very happy and a bit inibriated: the perfect combination! (By the way, this was the first time I ever cooked a turkey at home! I freaked out a bit and started planning the turkey recipe a month out. It was worth it! Everyone raved and said it was the best turkey the ever had!)

Once dessert hits, people kind of grab something off of the table and go stroll around the house and join in random conversations. My friends usually stroll in around this time after their family gatherings and nibble on leftovers. On Thanksgiving we had an inticing game of "Catch Phrase" after dinner.

I really love the holidays. When I was growing up I truely loved them as well because my mom would keep busy cooking and I would get the chance to stick my nose in every pot. The family would get together and we would all laugh and chat and have a great time. Once my mom passed, the holidays kinda lost their special meanings. It was hard to crack a smile when everyone was missing her so much. So when my fiancee and I bought our home, I vowed that I would do my best to get the family together on all the holidays and create new and wonderful memories for us to share. Once again, the house was full of laughter, chatting and the occasional squeal from the kids. There is something so wonderful and special about seeing my new, growing family around my dining room table, eating and sharing their stories. Every once in awhile, I swear I can hear my mom's laughter at the table; and for me, that makes it all worthwhile.

A Very Warm and Happy Holiday To Everyone

Tuesday, December 23, 2008

Happy Hanukkuh!!!


Tommorrow I am hosting a small gathering of family and friends at my house to celebrate Hanukkuh! I will be serving up my very popular "Citrus and Herb Turkey",
"Not So Green, Green Beans", "Rosemary Potato Pancakes", "Hot Spinach and Artichoke Dip" and much, more!
Naturally there will be plenty of pictures and recipes!

Happy Holidays to all!

Monday, December 22, 2008

Rosemary Meatloaf and Creamy Dreamy Mashed Potatoes


Meatloaf was always one of those American dishes that I never understood growing up. I always thought that maybe it was just one of those things that unless you were born and raised here, you wouldn't understand. I mean just the name of the dish makes me nauseous. I love meat, but in a loaf? Yuck! It wasn't until very recently that I actually developed a taste for the darn loaf! I have had some nasty meat loafs in my time. Some dry, some mushy, some just looked like mystery meat. Ehhhhhk. It wasn't until a few months ago that I developed a liking to this American classic. I was at a catering event and I tried the meatloaf. (On an ordinary basis I wouldn't, but I respected the chef so I figured that was the least I could do.) I was pleasantly surprised by how beautiful the little mini meat loafs looked. You see they were passed appetizers and they were perfect. The top had a beautiful crust on it and the inside....mmmmmmmmmm...delicious! It was moist and so flavorful! I instantly tasted fresh herbs in there.
I went home that night determined to make a delicious meatloaf.
I have made and remade several recipes. However, my latest one is by far the most flavorful and successful. It has all the components I was looking for.
I paired it up with the perfect and in my opinion the only side dish to go with meatloaf: mashed potatoes.
Now I have tried many, many different recipes for mashed potatoes, but this one is truly the perfect one for meatloaf, or anything else for that matter. It is simple enough that it does not take away the emphasis off of the main star of the plate but it is also so delicious that you will find your self licking the bowl, spoon and plate clean. (I did.)

I made this tonight, on one of the coldest nights we have had yet and while I had only a taste of both, (I am ATTEMPTING to watch my diet) my fiancee consumed every morsel on his plate and asked for more! It is a perfect meal for these cold nights in the winter when all you want to do is eat something yummy and go sip tea or hot chocolate on the couch.

Rosemary Meatloaf

5 pounds ground beef (I used lean chuck)
1 large yellow onion, finely diced
5 ribs of celery, finely diced
3 medium sized carrots, finely diced
3 tablespoons rosemary, chopped finely
1/2 cup ketchup
2/3 cup sour cream
salt and pepper to taste
olive oil to sautee

Preheat your oven to 375-degrees

*It is very important that you chop up these veggies finely. You want them to be seen but you also want them to melt into the meat. The only way to achieve that is to get a very fine dice. I will be posting soon on how to easily dice your most popular veggies.*
1. Combine all veggies in a sautee pan with a bit of salt and pepper and sautee until softened, about 8-10 minutes. You do not want them to brown just soften.


2 Add ketchup, sour cream, rosemary and seasonings to meat. Combine.
3. Add cooked veggies to the meat mixture and combine. *You can cool the veggie mixture so that it is easier to handle. I used rubber gloves and combine everything by hand while hot.*
4. Oil a pan that has a drip pan on the bottom, you almost want to roast the meatloaf. The perfect crust will only be achieved if there is no moisture surrounding the loaf, otherwise it will steam in its own juices and will not get a crust (trust me, I did this the first time around).
5. Place meat on the pan and shape it into a loaf shape. It does not have to be perfect. Just make sure that there are no cracks on the surface and that it is smooth.
6. Put it in the oven for 1 hour or until an internal thermometer reads 155-degrees.
7. Once it is done cooking, let it rest for at least 15 minutes.
*If your top did not crust up, just put the loaf under the broiler for 10-15 minutes and it will develop a beautiful crust.

The Perfect Gravy

I'll be honest, unless it's a holiday, I don't make gravy. But you have to with this dish, it practically screams for it! It looked naked without it!
Now I did not measure anything because I made it on a whim. But I will tell you what I put in it and you can make this without any measurements, it's not like we're baking anything!
I started out with the juices from the meatloaf. I poured some of those off into a sauce pan and added about 3 tablespoons of flour. Then I whisked vigorously to get rid of all the lumps. Into there I poured in some white wine, some beef base. It started getting kinda thick so I added in some chicken stock and whisked some more until it coated the back of a spoon. At the last minute I added in some freshly chopped rosemary and that was it! I promise it's just a bit of thickening and thinning, nothing else! If it gets too thick just add stock and if it's not thick enough add a bit more flour. That's the magic to a good gravy! Just be careful to add the flour a little at a time and remember it only gets thickened once it boils.


Creamy, Dreamy Mashed Potatoes

5 pounds potatoes, peeled, cut and washed
1 stick of butter
1 cup of half and half
3/4 cup sour cream
salt and pepper to season

1. Boil potatoes until they are fork tender.
2. In a small saucepan, melt the butter with the half and half on a low flame; keep warm.
3. Strain the potatoes so that there is not water left.
4. For the actual mashing process, I have found that using a food mill is by far the most effective way to get the creamiest mashed potatoes, with minimal effort. If you do not have a food mill then use a smasher or a mixer if you have it.


5. Add all the sour cream and half of the butter mixture to the potatoes. Combine and see the consistancy. Add in more butter and half and half if necessary. I like mine super creamy so I added it all in. Just add it in a bit at a time so the potatoes get a chance to absorb the liquids.

6. Taste for seasonings. Place a generous amount on a plate, load up with a few slices of meatloaf and drizzle some gravy on top!
That's it...NOW EAT!

Chicken Soup for My Soul...The Real Jewish Stuff!

There are very few foods in my life that I have fond memories of. Now this could be because I didn't eat as a kid, it just wasn't a priority to me. (I wish I had that problem now!) Chicken Soup was the ONLY food I would eat as a kid. We had to have it in the house all the time or else I went hungry. I can still recall that wonderful taste! The chicken from the broth was even flavorful! In fact it is still my comfort food. The best part was when my mother used to hand feed me with it. She would take a bite size piece of bread with some meat on it from the soup and put it in my mouth. OMG that taste still comes to my mind every time I make this soup! She tried to stuff in as many calories in my poor scrawny little self as possible...so she would add the skin off of the chicken as well. I still crave that! If I wasn't concerned about the size of my butt I would still be eating that!
When I got older and I actually ate something other than chicken soup, I still craved the soup on a cold day or when I wasn't feeling well. Anytime I was sick my mom would whip me up some chicken soup and it truely did heal the soul. Now I will say this, my mother hand fed me with this meal until I was 16. Somehow, everything always tasted better from her hands. It was always so simple, some chicken soup with cooked vermecelli noodles or rice and a few of the parsley roots and carrots from the soup. That was it. Nothing special, just good.

Today, my mother isn't around anymore to make me my own batch of chicken soup but every time I make my own, it still soothes my soul and makes me feel like she is in the kitchen with me.

Now please note this chicken soup is not that goopy canned condensed gross stuff. No this is the stuff that real Jewish grandmothers have passed down for generations. This is liquid gold. It is a golden broth, filled with minimal toppings but plenty of flavors! Mostly popular with the Ashkenazi Jews, this is the stuff that has been labeled the Jewish Penicillin. The cure all to heartbreaks and tummyaches; fevers and chest colds or just your run of the mill bad day. I don't even have to eat the soup, just the smell of it and the process of making it, makes me feel better!

On high holidays I usually serve it up with my fluffy matzoballs and everyone gobbles them up. On other days I serve with pieces of meat from the soup and some diced, cooked carrots, celery and onions.

It not only is the cure-all for all human ailments but also for animals. When my dog was a puppy, she got an upset tummy. The doctor told us to feed her rice. But my mom felt bad and gave her chicken soup with the rice instead. The dog felt better almost immediately. The past few days she hasn't been quite herself either. I gave her some chicken soup and the next day she was a totally different dog, keep in mind, she is 14 years old!

Honestly, no words can explain how important this soup is to me. It may sound silly, but in many ways it is the tie that I have to my mother. No matter what age or what season I gobbled it up and always asked for seconds. I always felt the amount of love that my mom put in her soup. She always told me, "Cook only when you want to and no matter what you add, a piece of you must always be in it. Your food will always taste great." Her chicken soup was always hers. It tasted different than when my grandmother made it. Prehaps that was why it made me feel better. My mom's chicken soup can never be duplicated because she won't make it, but there are certainly ways to come close and that's the best I can do.

On Sunday, it was cold..AGAIN and STILL...so I needed a pick me up and I love when the house smells like chicken soup. It just makes me feel whole again.


My Chicken Soup (based on my mom's original recipe)

1 whole chicken or cut up chicken pieces (with skin-on)
6 or 7 large carrots, peeled and cut in half
2 large onions, peeled and cut in half
5 celery stalks, cut in half
1 bunch dill, washed
1 bunch parsley, washed
1 parsley root, peeled and cut in half
1 tablespoon black peppercorns
Kosher Salt
*I'm sure you noticed there is no chicken base in this soup. Well if you do as the recipe says and you let the soup cook for awhile, you will never need any base in this soup. My mom never used it in this soup and neither will I.*


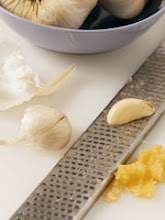
If there was one thing that my mother taught me about cooking it was to use the best products you can. This recipe is no different. Try and get an Amish or Free Range chicken. They even look different, you will notice they have a more yellow tint to them, due to the difference in their diet.

In Russia, when I was growing up, we didn't have any pesticides or horemones in our food, so it tasted like food should taste: REAL. For a long time when my mom made the soup here, it just didn't taste right. Then one year she bought an Amish chicken. OMG! It was like a taste of the old country in a bowl! Finally we found the secret! It made a huge difference and we never went back to the regular chickens. So please, spend the extra few bucks and buy a nice bird, for soup's sake!

Now the pot. You want a nice big stock pot. Mine is an 8 qt.


There are 2 secrets to make a really great stock or soup.
#1. Start with cold water, ALWAYS.
#2. Add only Kosher Salt to the water, it clarifys the stock and makes it less cloudy.
That's it. Other than that it is just patience.
Add in your chicken and 2 tablespoons kosher salt, cover completely with water and let it simmer. Once the scum comes up, (it's really just coagulated blood) skim with a slotted spoon.


Continue to skim the soup until no scum comes up. Turn down the soup to a simmer and add in all your veggies and black peppercorns. Let the soup cook for about another 2-3 hours or until desired taste is achieved. Sometimes I take out my meat and just let the soup go for even longer to develop the sweetness and golden color in the soup. The carrots will achieve that beautiful golden color and sweetness that you want.
*When the chicken was done, I could not help myself but taking a piece out of the soup. I ate it just the way my mama fed it to me: I took a piece of bread, (whole grain) ripped off a piece of meat with it (with the skin) and ate it. I savored every bite, it really did take me back to my childhood.*

Once the soup is done place it in the cooler for at least 5 hours, overnight is best.
You want the fat to come to the surface. Once it has been refridgerated, take out all the big pieces of veggies that you can grab.


Then strain it through a double layer of cheese cloth. You can secure the cheese cloth with clips that you use to close your bags of potato chips, this will keep the cheesecloth from falling into the container you are straining into.


Once it is strained, you just add some of the carrots, onions and pasley root from the soup, throw in some cooked noodles or vermecelli and enjoy!

You can also pour some off into ziplock bags and freeze in until a rainy day!

Crab Cakes with Galic Aioli


I am not a seafood eater. In fact, I can't stand the stuff! When it comes to seafood I only eat fish, scallops and calamarie. All those other underwater creatures that people eat (i.e shrimp, lobster, crabs etc) I consider underwater insects, YUCK! However, my fiancee and everyone else I know loves the stuff! So I started to enjoy cooking it, not eating it, just cooking it. My fiancee went out and decided to buy himself some lump crab cake and told me to "be creative with it."
Well before I told him to shove it, I realized that it was Sunday morning and it was cold outside and I really had nothing better to do...so my crabcakes were born!
I was at a party once and they had these yummy little salmon cakes that were bound with basmati rice. I had some left over risotto in my fridge and figured this would be a perfect opportunity to use it! They really did come out perfect! The risotto adds a different type of texture to it and the variety of colors of veggies looked like confetti inside! The garlic aioli on top added just the right touch!


Crab Cakes


2 cups of lump crab meat
1 cup of cooked risotto
1 red pepper, finely chopped
1 green pepper, finely chopped
1/2 red onion, finely chopped
1 stalk of celery, finely chopped
1 handful of cilantro, finely chopped
1/4 cup of mayo (I used fat free)
juice and zest of 1 lemon
salt and pepper to taste
Panko bread crumbs for breading
olive oil for frying

1. In a bowl combine all ingredients together and taste for seasoning.
2. Place some Panko bread crumbs into a plate and bread the crabcakes evenly on each side.


3. Once breaded place them in the cooler for an hour so they can chill.
*I did not do this because my man was in such a hurry to eat! However, because of that I had a very hard time keeping them together when they were cooking. Cooling them helps them keep their shape.*
4. Heat some olive oil in a non-stick pan and sautee them up on each side, just until golden brown.


Garlic Aioli

1/2 cup mayo
1 tbsp freshly squeezed lemon juice
1/4 tsp cayenne pepper
2 tbsp minced garlic
a couple of squirts of Tabasco
salt and pepper to taste

Combine all ingredients and place on top of crabcakes.

Thursday, December 18, 2008

Honey Mustard and Herb Pork with Orzo


I went a bit crazy yesterday...yup I sure I did. I cooked my little butt off. I got home at a reasonably early time and decided that rather than folding laundry (ehhh my least favorite thing to do!) I would cook. And cook I did!
A few days ago, I was doing my weekly shopping at the grocery store.
*My hint for people who are trying to be on a budget. Plan your meals around the things on sale. Once I started planning my menus around the protein that was on sale, I was able to cut my monthly grocery bills in half! Now before I go to the grocery store, I look at the store's ad online and plan my recipes that way. It gives me a better idea of what to eat that week. Additionally, since the stores never have the same cuts of meat on sale week to week, it enables me to have tons of variety in my menus!*
This week pork sirloin chops were on sale. So I decided to create a recipe for roasting them. I used to typically bread my pork and fry and then finish it off in the oven. But then all that breading went straight to my thighs so I decided to change my cooking options a bit. Now granted everyone loves that crust that pork chops get when they have been fried. But I have discovered a new way to keep the moisture in and keep the crust one with half the calories!
Two little words: Roasting and Parmesan Cheese!
If you have a roasting option on your oven USE IT! It is not only for obvious things like Thanksgiving Turkey ROASTS or Pot ROASTS, it can be used for absolutely anything! You see roasting combines your broiler heat and the regular baking option. Giving you the crispy crust from broiling and a tender inside from the heat. For this dish, high heat is necessary for the entire cooking time. Since our pork is a reasonably small cut, not large like say a pot roast is, it will cook fast! So the high heat is necessary to give it that caramel colored crust.
If you have a convection oven, (which I do), in which the hot air in the oven is constantly moved around, USE IT! It will ensure an evenly cooked pork chop in the fastest amount of time.
*Just a note, all of my recipes are based off of a convection oven, unless otherwise stated. So in other ovens it may take longer*

Now for the second secret to a crust...Parmesan cheese. Everyone loves Parmasan cheese on their pasta, but it also does wonders for crusts. It caramalizes and gives a little bit of a crust! MMMMMM Yummy!

I have to say, I really, enjoyed this recipe! It was easy and the flavors were amazing. The mustard and sweetness of the juice and honey really worked well with the pork. It was tender and super flavorful! I hope you enjoy it as much as I did!


Now onto the recipe!

-3 Pounds of Pork Chops *(I used sirloin bone-in chops)
-1/2 cup Honey Mustard *(I had already prepared honey mustard, but you can make your own with just good Dijon mustard and a couple squirts of honey)
-1/2 tbsp Garlic Powder *(If you use regular crushed garlic, it will burn because of the high temperature.)
-2 tpsp apple juice
-1/2 tbsp Onion Powder
-1 tbsp Fresh Rosemary, chopped finely
-1/4 cup Parmesan Cheese *(Just enough to sprinkle on top)
-Salt and Pepper to taste
*Preheat oven to 425-degrees

1. Lay out the pork chops on an oiled baking sheet, with another pan below it. This is done so that the pork can actually roast and the fat will drip down to the bottom. Otherwise it would cook in its own juices and not get color.
2. Season them with salt and pepper on both sides.
3. Combine apple juice, all the seasoning and herbs with the honey mustard and mix to combine.
4. With a pastry brush, smear your honey mustard mix on ONE side of the chops.

5. Sprinkle with a bit of Parmesan cheese and place in the oven for 10 minutes.
*Please keep in mind, that cooking times will vary based on your oven, convection cooking and the thickness of the chops. If in doubt, just place a meat thermometer in the middle of the chop, making sure not to touch the bone until it reads 155-degrees. This will ensure juicy chops every time!*
6.After ten minutes, flip your chops over and smear and sprinkle the other side. Place back in the oven for another 7 minutes.
7. There now it's done!
*If your oven cooks really fast like mine does, the second side may not brown up as much as you would like. In that case, turn on your broiler for about 3-4 minutes and they will brown up nicely for you!*


Basil Scented Orzo


I love orzo! And now that they came out with whole wheat orzo, I am guilt free, YEAY!!! I wanted to do something really simple with lots of classic flavors with this pork chop. I was craving pasta but I just wanted something on the lighter side. So this dish was perfect! The tomatos just pop in your mouth and the white wine adds a very clean flavor to the dish.

-1 cup of un-cooked whole wheat orzo (you can use plain orzo too)
-1/2 pint of cherry or frape tomatos, sliced in half
-7 basil leaves in a chiffonade
-1/2 a red onion, finely diced
-1/2 cup of white wine
-3 cloves of garlic, minced
-Olive oil to cook
-Salt and Pepper to season

1.Cook the orzo in a pot of boiling water with salt.
2.In the meantime prepare all your ingredients.
*The chiffonade of basil is just a very fancy French way of saying slice for herbs. First, stack your herbs one on top of each other and roll them up like a cigar. Then slice. That's it!


3.Sautee your onions in olive oil on a medium to low flame, you just want them to be tender, no color. Add in your tomatoes, garlic and wine. Let wine reduce.
4. Strain the orzo and toss with onion tomato mixture. *(If it's too dry, add a touch of broth)
5.Add the basil, salt and pepper. Toss to combine and serve with pork.
Bon Appetite!

Orzo and Chicken Meatball Soup


"Oh the weather outside is frightful
But my soup is so delightful!
And as long as I have it near,
Let it snow, let it snow, let it snow!"

We are expecting a snowstorm tonight and so to prepare for it I made a really healthy and warming soup last night. There are 2 things I like to do when it snows, either have a snowball fight or stay at home, cook and eat soup! So since the winter storm warning calls for sleet, snow and hail, I figure I 'll stay in.

This soup is easy and filling. It is a different take on chicken noodle soup.
When I make any chicken based soup I have one secret. It was the one trick that my chefs in school taught me that has kept my soups tasting amazing! It's chicken base. Not those disgusting little salt boullion cubes. But more like a chicken demi glace. There's a brand out there called "Better than Boullion" . Most stores carry it and their product is really amazing. I use the chicken and the beef bases for my sauces and soups. Just a tablespoon of this stuff adds a much deeper flavor to any soup. What I like about this product, is that it is not as loaded with salt as the little boullion cubes. So you can get the depth in flavor without eating a pot of salt!

Mini Chicken Meatballs
-1 pound ground chicken
-1 egg
-1/2 tsp garlic powder
-1/2 tsp onion powder
-salt and pepper to taste
-olive oil to sautee

1. Combine all the ingredients in a bowl.
2. Make little meatbals about the size of a quarter.
3. Preheat your oil in your soup pot and sautee your meatballs until they are golden brown in color.


Soup

-2 quarts chicken stock/broth (storebought or homemade)
-1 medium sized onion, diced
-15 baby carrots, sliced into rounds
*I prefer to use baby carrots because I don't have to peel or wash them, they are just ready to go*
-2 Stalks of celery
-1 bay leaf
-1/2 cup orzo
-zest and juice off 1/2 a lemon
-1 tbsp chicken base
-Salt and Pepper to taste
-a handful of parsley, chopped for garnish


1. After your meatballs are done cooking remove them into a seperate bowl and turn the heat down to a medium low.
2. Add your onion, celery, carrots and bay leaf.
3. Toss in the oil and the browned bits from the meatballs.
4. You only want to soften the veggies, not brown them.
5. Cook them for about 7-10 minutes.
6. Once softened, add in your chicken stock/broth and turn up the hear to medium-high.
7. Once the soup comes up to a boil add in your orzo.
8. When orzo is al dente, add in your meatballs and cook for five minutes more.
9. Once meatballs are done, add in lemon juice, lemon zest and chicken base. Season to taste. *You will notice the soup will become a bit more yellow from the base. Taste it for seasoning. If you want a richer flavor, add in some more 1/2 a teaspoon at a time.*
10. Remove bay leave and serve. Garnish with the chopped parsley

Pork Stir-Fry


I absolutely love this dish, for 2 reasons:
1. I was finally able to finish off the Asian Pulled Pork!
2. I was able to use some of my short-cut secrets from my favorite store Trader Joes!

Now a very important side note. Trader Joes is probablly one of the best stores I have ever found! It was the one store that actually made me feel ok about buying premade sauces. I have tasted every single one of their jarred sauces and they all taste as good as homemade. I know that there are never any additional preservatives in there and I can feel good and healthy serving it up to my family and friends. It also has some of the best tasting frozen veggies. Yes thats right a culinary grad uses frozen veggies. Look sometimes it is more economical and smarter to buy frozen. All my favorite veggies are not always in season and are very expensive. So frozen is the best option. I have bought their asparagus, Asian veggie medley, corn, peas, tri-color pepper medley and even the grilled veggies! All of them tasted perfect once cooked! I am all about saving time without compromising flavor and quality of food! If you don't have one near you then email them immidately and make sure they open one up ASAP!

This stir fry is extremely satisfying and easy to make. If you have 10 minutes you can make it!

Pork Stir-Fry


-1 cup of shredded Asian Pulled Pork (finally I'm using the last of it...)
-1 packet of Trader Joe's frozen pre cooked brown rice.
*This product is fabulous! Each packet holds about 3 ounces of pre-cooked rice. All you have to do is cut a vent in the top, stick it in the microwave for 3 minutes and you have perfect rice! It's great for a quick starch when there's no time for anything else*
-1/2 cup Trader Joe's frozen tri-color pepper medley (includes red, green and yellow chopped peppers)
-1 cup Trader Joe's Asian Stir Fry Mix *This stuff has it all! Water chestnuts, mushrooms, soybeans, peapods, carrots, the works!*
-10 Trader Joe's Frozen Asparagus Spears, cut in half
-3 garlic cloves, finely minced *See hint below*
-2 tsp of ginger, minced
-1 whole medium onion in large dice
-2 scallions sliced on the bias
-1 egg
-1/4 cup of tamari sauce *Tamari sauce is a deeper colored and flavored soy sauce. It is fermented for longer and therefore has a stronger more pronounced taste*
-1 tsp sesame sauce
-1 tbsp lemon juice
-1 tsp garlic chilli paste *CAREFUL this stuff is very spicy*
-Olive oil for sauteeing

1. Pour olive oil in a heavy bottomed pan and turn the heat up to med-high.
2. Toss in the onions and leave them alone. Watch them, but don't touch them. After five minutes one side of the onions should have some color, but they should still be crisp. (this is why the onions are cut in a large dice.)
3. Toss the onions a bit and cook for another 3 minutes on the other side.
4. In the meantime, take your bag of rice and stick it in the microwave for 30 seconds. You don't need the full 3 minutes because we are not cooking it all the way in the microwave, just enough to soften it.
*If you cannot get the Trader Joe's rice, just cook up some brown rice and use that instead.*
5. Add in all your veggies into the pan with the onions. Toss them around and let them cook for about 3-4 minutes or until visibly softened.
6. Crack your egg in another bowl and scramble it with a fork.
7. Make a well in your pan and pour the scrambled egg into it.


8. Let the egg settle for about 2 minutes. Then with a HEAT PROOF rubber spatuala start scrambling it. Stir it until all of it is cooked. Then combine egg with the rest of the veggies.
9. Add shredded pork and rice and combine with egg and veggie mixture.
10. Add in ginger, garlic, tamari, sesame oil, lemon juice and chilli paste.
11. Toss everything once more to make sure it's all combined and serve!


HINT: One of my favorite tools is the microplaner. It is mostly used for zesting fruits. However, i I discovered another wonderful way to use it: I grate my ginger and garlic on it! It's super fast and more effective then doing it by hand. Just be careful, those things are SHARP!

Wednesday, December 17, 2008

Adventures with My Crock-Pot

As of 6 months ago, I acquired a new best friend: the mighty crock-pot. This is truely is one of the most underused appliances of today! I myself was very skeptical of it! I always wondered how something could be so easy...just stick in some meat with some flavors and liquids and you have a delicious meal waiting for you when you come home??? Surely there must be a catch somewhere.

Then one day, I was shopping at a Linen's n Things that was going out of business and one fell off of a shelf on me. It literally dropped out of the sky! I figured this was a sign from above (or maybe a clumsy sales assistant) and therefore I must immediately purchase it. And why not, for $26.95 it was a sin not to!

My culinary adventures began immediately with the crockpot. I had a huge pork butt sitting in my freezer just waiting to have something done to it. So I figured, BBQ pulled pork! I was so impatient that I threw the whole frozen thing of meat in the crock pot, added some bbq sauce and some seasonings. I set the thing on low and kept an eye on it. Absolutely nothing happened for the first hour...I barely saw bubbles after the second hour....But then suddenly it was on a full roaring simmer...I let it go until the wee hours of the morning. When I woke up, the house smelled of BBQ, as if I was cooking all day! Then I took the pork out. It was absolutely perfect. Fell apartand shredded beautifully. All I did now was pour the cooking liquid into a smaller container and reduced it to a thicker consistancy. We had pulled pork sandwiches...pulled pork wraps...you name it I did it!!!!
After that I had no boundaries! Stews and roasts and soups went in there! To this day there is no chili quite as amazing as my crock-pot chilli!!!
I suggest that everyone who has a crock-pot attempts at least one dish in it. You will be changed for life! And if you don't have one, I hear many Linen's N Things are going out of business; and if you're lucky maybe one will just fall on your head.

Asian Pulled Pork...In a Crock-Pot


This has to be by far the most resourceful dish I have ever made! I have literally used it in over 5 dishes!!! The dish could not have been simpler to make. Plus in the winter season it's nice to have something that cooked all day (or night) and melts in your mouth!
Asian Pulled Pork
1 (5 lb) pork butt,
1 cup soy sauce
1 tbsp sesame seed oil
*sesame seed oil is very powerful, a little will go a long way for you*
1/2 cup hoisin sauce
2 tablespoons of sliced ginger
7 whole garlic cloves
3 green scallions, roughly cut
2 tsp garlic powder
2 tsp onion powder
1 thai chili pepper
*if you do not like it hot, just leave the chili pepper out*
salt and pepper to taste
Enough water to cover the pork
-Rub down the pork with salt, pepper, onion powder and garlic powder.
-Place into your crockpot and place all the ingredients except the water into the pot.
-Add enough water to just cover the top of the pork.
-Turn on your crockpot to high and leave it alone for 8-10 hours, or until the pork shreds easily with a fork.
-That's it! You're done! Now just serve it with your favorite veggies and brown rice and you have a wonder meal.
*HINT: You can strain the remaining liquids into another pot and cool it. Once it has cooled, remove the fat from the top and reduce it until it reaches a thicker consistancy. This can be used as a sauce or as a dip for an Asian Pork Sandwich!

Lettuce Wraps


This dish was one of the Asian Pork creations! I was in the mood to make something simple and healthy for dinner. I had a bunch of veggies in my fridge and of coarse the Asian Pulled Pork.
My fiancee who rarely likes any of the "rabbit food" I make, gobbled it up in a heartbeat! The crunchiness of the lettuce combined with the smoothness of the pork will prove to be a satisfying meal for the pickiest of eaters!

Pork Lettuce Wraps
Serves 4, with 3 lettuce wraps each

12 leaves of Bibb or Butter Lettuce
*I only had iceberg lettuce, which did the job just fine.*
Asian Pork , shredded
2 medium carrots, cut into matchsticks
1/2 an English Cucumber, cut into matchsticks
3 tbsp of cilantro, roughly chopped
1 cup of bean sprouts
2 scallions, sliced on a bias
1/2 tsp sesame oil
1 tsp sesame seeds

Shredded Pork


-Combine all veggies in a bowl and toss with sesame oil and sesame seeds.
*This can also serve as a really great salad!

Place the pork and veggies onto lettuce leaf, roll it up. That's it!

Dipping Sauce

1/2 cup of soy sauce
1/2 tsp of garlic chili paste
1 tsp of honey
the zest and juice of one lime
*Use a microplaner to zest the lime. Do not get any white pith in, it's very bitter.

-Combine all ingredients and serve!


This dish is super simple and if you want something more heartier start out with a bowl of Udon noodles or better yet a bowl of soup! *Recipe to come soon*

Mind you mine weren't the neatest looking wraps, but I was in a hurry!
They tasted just as great!!

Monday, December 15, 2008

Trio of Flatbreads

Recently we were at a wedding and one of the appetizers they served was flat breads with smoked salmon and a garlic sour cream. I almost forgot how much I enjoyed those little things! They are crispy, crumbly and creamy all in one! I was going through some old cookbooks from a culinary class I took and stumbled upon a wonderful and simple flat bread recipe.
I had a bunch of stuff in my fridge that I wanted to get rid of. So this trio of flat breads kinda became my "everything but the kitchen sink" meal!
The dough proved to be very, very easy to make! It rolled out beautifully and I was able to keep it really thin. You don't have to worry about making it a perfect circle or a perfect square, the more rustic the shape the better! The recipe stated to put some herbs into the mixture. I used rosemary for all of them, but you can use whatever herbs you like.

Serves 4
1 3/4 cups unbleached all-purpose flour
1 tablespoon chopped rosemary
1 teaspoon baking powder
1/4 teaspoon salt
1/2 cup water
1/3 cup olive oil plus more for brushing
*Preheat oven to 450°F with a heavy baking sheet on rack in middle. I used a pizza stone instead.
Stir together flour, chopped herbs of choice, baking powder, and salt in a medium bowl.
Make a well in center, then add water and oil and gradually stir into flour with a wooden spoon until a dough forms. Knead dough gently on a floured work surface a few times.
Divide dough into 3 pieces and roll out 1 piece on a sheet of parchment paper into a 10-inch round. Make sure you cover the others with plastic wrap so they don't dry out.
Lightly brush top with additional oil and scatter small clusters of rosemary leaves on top, pressing in slightly. Sprinkle with sea salt. Slide round with parchment paper onto preheated baking sheet and bake until it is a pale golden color, about 8 to 10 minutes. Transfer flat bread to a rack to cool, then make 2 more rounds (1 at a time) on fresh parchment. Since I was making them right away with my toppings...I took out one of my oven racks ahead of time and used that as my cooling rack. That way, I could just assemble flat bread and stick them back in the oven.
*Flatbread can be made 2 days ahead. Just cool it completely, and keep it in an air tight container at room temperature.*

I made 3 different flat breads, Lorraine, Caprese and Thai Pork.
Lorraine:
;<img id="BLOGGER_PHOTO_ID_5280805381065078018" style="DISPLAY: block; MARGIN: 0px auto 10px; WIDTH: 320px; CURSOR: hand; HEIGHT: 240px; TEXT-ALIGN: center" alt="" src="https://blogger.googleusercontent.com/img/b/R29vZ2xl/AVvXsEiem2A2JQrwzAdsZGkkXgxQ-NbNcBpde30pyp6BMQfVMzejxe8kA9oVKUyfWU3LFIr0MK7otFGtbJ9tEkREbvvYDbiA0YqKi-gaFPXlS-n68mG0tJnTA4hqsqlvnMPuHS-hvTRqX93QSHo/s320/Marina's+Bday+016.jpg" border="0" />Anything with the word Lorraine in it has proven to be good! Bacon, caramalized onions and Swiss Cheese are the usual suspects in a really great Lorraine Quiche. Here you get the same great flavors without the fuss of a traditional quiche.
Olive Oil For Brushing Flat Bread
4 Slices of Bacon, Chopped
1/2 Large Onion, Chopped
4 oz Gruyere Cheese; Shredded (Any nice, sharp cheese will do)
Salt and Pepper for Seasoning
Put the bacon in a sautee pan and let the fat render. Once some fat has rendered, add the onions and season to taste. Brush the flatbread with some olive oil and the bacon and onion mixture on flatbread. It does not have to be perfect, just make sure that it is nicely covered. Add the cheese on top and place in a 450-degree oven for about 8-10 minutes, until the cheese is all bubbly and melted. Use a pizza slicer or a large knife to cut into pieces. Cut immediately after it comes out so that it does not dry out.


One of my favorite salads to eat in the summer is a Caprese salad. There's something about the thinly sliced tomato, fresh mozzarella and fragrant basil, that makes you feel like you are in a vineyard in Italy. This flatbread turned out with the same vibrant flavors and proved to be my favorite of all three.
Olive Oil For Brushing Flat Bread
1/2 a Tomato, thinly Sliced into half moons
4-5 ounces of Fresh Mozzarella, sliced
A Handful of Roughly Chopped Italian Parsley
*Traditionally in a Caprese, basil is used, however, I ran out of basil, but had plenty of parsley, and since parsley is used so frequently in Italian cooking, it was the perfect substitute.
Brush the flatbread with some olive oil and place tomatoes on top. Place the slices of cheese on top, making sure to cover all surface area. Sprinkle with basil leaves or in this case parsley.
Place in the oven for and place in a 450-degree oven for about 8-10 minutes, until the cheese is all bubbly and melted. Use a pizza slicer or a large knife to cut into pieces. Cut immediately after it comes out so that it does not dry out.


Thai Pork Flat Bread:</u>;</div>
Last week I made some Asian Pulled Pork in my crockpot (that recipe will be on another topic). I had a bunch leftover and had no clue what to do with it. So I froze some of the pork and the rest I used on this flatbread. I added some cilantro leaves and chopped up baby bok choy. Then I drizzled some seasame oil and sesame seeds on top to give it some character. After 8 minutes in the oven it came out looking absolutely perfect. The sauce from the pork melted into the rest of the ingredients and blended everything perfectly.

These little flatbreads were perfect for a night when you want to get your creativity going!