Friday, January 30, 2009

My Life in Mid-Air

So as I mentioned in an earlier post, I got laid off. So I have had lots of time to think and think and think. After working in the culinary and event industry for close to 10 years (I started young) I am convinced that this is where I want to be for the rest of my life. The hours are long, the days are crazy and the people even crazier...but there is nothing in the world that I would rather do. So after working for a catering company as a catering sales manager and event coordinator, I wanted to make sure I never had the same horrible experience of being laid off. It has taken me almost a week to realize that although our economy is low my talents are still ranking pretty high. After coordinating my best friend's wedding, the most complicated wedding I have done to date...I have taught myself that the best way to succeed is to rely only on yourself. I am blessed with a best friend that knows exactly what she wants and for the most part we agree on those things. However, when she needs some creative advice or a nudge in the right direction, I have no one to turn to but myself. In a way, this has been a complete confidence booster. It was terrifying at first that sometimes I did not know the answer and I had no one to turn to, so I just went with my gut feeling...and it was right. For all the times that I wasn't right, I realized I am only 26 I am allowed to make mistakes.

Naturally, I want to work for myself, be a part of the American Dream, be bigger than I can be. Coincidentially, I was watching Oprah this morning...and she had on some self made millionaires, both of whom were 26 years old and under! The one thing they both had to say was to do what you are passionate about. The goal should never be to make money but to do something you honestly love for as long as you can. When passion is the driving force, money will follow you wherever you go.

I figure I'm young, I have no kids and I have been laid off! All perfect reasons to get my wheels in motion to start my own Event Consulting business. Everyone is so supportive of my idea, which I am quite shocked about!

I know that I need to make money, so I think I may go work at my friend's restaurant and help him as a server. I always loved being a server and the money was really quite good. This will also allow me have some free time to promote myself to vendors who work with people who would be needing my services.

I know many women that read my blogs went ahead and started their own businesses and were quite successful with it. I would love to hear any feedback that you may have for me!

Thursday, January 29, 2009

Dolmades


I stumbled upon Avesta's wonderful blog accidentally and discovered some of her awesome Middle Eastern recipes. One of which reminded me of a dish my mother used to make. Dolmades, traditionally are grape leaves filled with a rice and vegetable mixture. My mom used to make them with the Russian influence, a dish similar to the traditional Ukrainian stuffed cabbage rolls, "Golubtsi". Instead of the usual rice and pork mixture, she added in parsley, dill, diced tomatos, tomato paste, scallions and diced beef. My mom then stuffed them into grape leaves and cabbage and they were poached in a broth and devoured almost immediately!


Avesta's recipe was very similar and it inspired me to make them during my Middle Eastern week. I combined ground lamb, herbs, rice and a variety of spices to make these delectable rolls. I myself had 2 immediately after cooking them! Use your own creativity to combine limitless flavors! On Avesta's site she demonstrates several different vegetables that can be used to stuff! Thanks Avesta for this wonderful recipe!
*Please view Avesta's site for this wonderful recipe!

Here is how they look as you wrap them!


Wednesday, January 28, 2009

"Shish Tawook and Batata Harra" Yogurt Chicken and Spicey Potatoes


I had a bunch of Labne yogurt leftover and was reminded of this chicken recipe. I used to make this chicken in the summertime on the grill all the time. The mild tanginess of the yogurt and the sweetness of the ketchup creates a flavor profile that is hard to resist. Finish it off with some spicy herb potatoes and a perfect dinner awaits you!

"The recipe originally called for chicken breast, however, I found some beautiful boneless, skinless chicken thighs on sale this week and used those instead. They were moist and even more flavorful than the chicken breasts."

Shish Tawook

1.5 pounds Boneless, Skinless, Chicken Thighs
3 cloves minced garlic
1/2 tbs tomato paste
2 tbs ketsup
1/4 cup yogurt
1/4 cup lemon juice
1/2 tsp salt
1 tsp paprika


1. Trim fat and excess membranes from chicken thighs.
2. Cut chicken into 1/2 inch cubes and place in a plastic bag.
3. Place all ingredients into the plastic bag and shake to combine, making sure chicken is covered.
4. Let marinate in refrigerator for 2-3 hours.
5. If grilling outdoors, skewer onto metal skewers and grill about 5 minutes on each side, rotating so that they do not burn. Otherwise preheat oven to 450-degrees and cook for 10-15 minutes on a greased pan.


Batata Harra


2.5 Pounds Red Potatoes, Washed, Dried and Cut into Cubes
1 Handful Chopped Parsley
1 Handful Chopped Cilantro
1/2 tsp Cayenne
1 Tsp Salt
8 Cloves Minced Garlic
1/4 Cup Olive Oil


1. Lay potatoes out on foil sheet pan and toss lightly in 2 tbsp olive oil. Place in a 450-degree oven until potatoes are done, 30 minutes.
2. Add the remaining olive oil to a pan along with the remaining ingredients.
3. Cook on medium heat fro 10 minutes, make sure not burn the herbs and garlic.
4. Remove the potatoes from the oven and pour the herb garlic mixture over them.

Serve this dish with a nice Middle Eastern salad.

Kefta Kebob with Dill Brown Basmati Rice


Mmmmm Kefta Kebob. I first discovered this dish going to Reza's Restaurant in Chicago. My brother and I were always big fans of the "Sultani Platter": Seasoned Ground Beef Kabob and a Thin Cut of Filet Mignon Kabob. After numerous trips to the restaurant and countless times of ordering the same meal, we both realized that the Filet Mignon Kebob, was really a waste of our time. It was not the filet we were after, it was the ground beef kebob. So we started ordering the "Koubideh Kebob": a seasoned ground beef kebob. Whether you call it "Koubideh" like the Persians or "Kefta" like the Iranians and Lebanese, it is a wonderful treat.
There are many different recipes, however they all share a few signature ingredients: beef, parsley, onions and sumac. The best flavor comes from chargrilling the kebobs, unfortunately it is winter here in Chicago and the only option I have is my oven. The flavors still come out really delicious and other than the char markings from the grill, they get nicely caramelized.

Onto the rice...It sounds easy...but it's not. Many a times have I messed it up. Instead of getting perfect, individual rice grains...I ended up with mushy rice pudding. The problem: improper measuring. I added more liquid than necessary and ended up with a basmati mush. I tried to cover it up with dill and it somewhat helped distract the eye, but once I put in my mouth, there was no covering up the disaster. I had messed up rice! RICE! One of the basic components in most middle eastern cultures...a dish that 10 year old girls can make...I had FAILED at! And much to my disappointment I had no more Basmati rice left! NONE! With 13 different things cooking on the stove, I was not about to run out to Trader Joe's and get more. Plus I hate wasting food, so I used it. Fortunately, my fiance could not tell the difference! Yeay for me!

I recalled my birthday party 2 years ago where I made a huge Middle Eastern feast. I remember that my Basmati Dill rice was perfect, in fact I remember everyone asking me if "Reza's Restaurant" had catered it. So clearly I was capable of making a perfect Basmati Rice. I found the recipe I used last time and I swear by the end of this week...I will make perfect Basmati Rice...


Kefta Kebob

2 Lb. Ground Beef 15% fat
2 Handfuls parsley
2 Onions
2 tsp. salt
1 tsp. black pepper
1 tsp. sumac
1 tsp. 7 spices


1. In a food processor, shred parsley and onion together until it is smooth.
2. Add to ground beef along with all spices.
3. Shape meat with hands into sausage like shape.
4. Place in a 450-degree oven for 30 minutes or until juices run clear.


5. Serve with rice and sprinkle with sumac.

It's Not My Month...

Ughhh...first the flu and as of last week I got laid off...AHHHHH! I guess the good news is I get to cook and blog more :)
It's Middle Eastern week this week...so I have a bunch of my Persian and Iranian favorites ready to go!

Wednesday, January 21, 2009

Viva La France: Salmon En Papillote


I found salmon at a really great price this week and wanted to do something simple and tasty. Salmon is one of those really forgivable fishes, it takes on practically any flavor and even overcooked it tastes alright. Being French week and all, I wanted to do something inspired by the French. "En Papillote" seemed like the perfect idea. En Papillote is a gentle method where the fish cooks in an enclosed packet, typically made of parchment paper. It steams in its own moisture and creates its own sauce of natural juices.
I love cooking En Papillote for a small crowd. They each get to have their own little package and as they unwrap it, a strong aroma escapes from it and invites them to dig in.
My mother used to bake her fish in the oven like this. She only used simple aromatics to blend with the juices of the fish and create a nice delicate sauce.
I unfortunately ran out of Parchment paper so I used the next best thing, foil.
The result was perfect...nice, light and extremely flavorful! I paired it up with some steamed broccoli with garlic oil.

Salmon En Papillote


1 Fillet of Salmon
1/2 a Red Onion, sliced
1/2 a Red Pepper, sliced
1/2 a Lemon, Sliced
1 Tablespoon Fresh Lemon Juice
Olive Oil
Salt and Pepper to taste

1. Lay out fish on parchment paper or foil and season with salt and pepper.
*If serving individual portion, just up the salmon into pieces and serve in individual packages*
2. Nicely place all the veggies on the salmon fillet.
3. Finish off with a drizzle of olive oil and lemon juice.
4. Place in a 450-degree oven for 15-20 minutes.
5. Serve immediately in its packaging!

Viva La France: 20 Clove Garlic Chicken with Thyme Potatos


Chicken, in my opinion, is probably the easiest to cook...and can also be the blandest. I wanted to make a very flavorful chicken with simple ingredients. I made a similar version to this dish once in culinary school and it was so perfect. I have been doing different variations of this dish ever since, this recipe is by far my favorite so far. Some shallots, pancetta and a whole lot of garlic make this dish absolutely irresistible!
The potatos were super simple. I cut up a bunch of Yukon Golds and roasted them with olive oil, fresh thyme, salt and pepper. Easy and perfect!


1 Whole Fryer Chicken Cut Up
2 Shallots, Diced
4 Oz Pancetta, Diced (You can use regular bacon, but I had Pancetta in the house)
4 Sprigs of Thyme
20 Cloves of Garlic
1 Cup of White Wine
1 Cup of Chicken Stock (or enough to cover the chicken 1/2 way up)
Olive Oil
Salt and Pepper to Season


1. Heat a heavy bottom pan to smoking point with the olive oil in it.
2. Season chicken heavily with salt and pepper.
3. Add to pan, skin side down and brown on each side. Make sure you get a nice crust on the chicken. It will add a lot of flavor to the sauce.
4. Remove the chicken from the pan and lower the heat to medium.
5. Sweat the shallots, pancetta, thyme and garlic together. The pancetta should begin to brown nicely. Season with salt and pepper.
6. Pour in the wine and scrape the bottom well to pick up all the brown bits. Let the wine reduce by half.

7. Add in your chicken and pour in chicken stock. Making sure your chicken is covered half-way up.
8. Continue cooking this on low, just barely simmering for 45 minutes. Make sure to turn the chicken over half way through.
9. Once the chicken is done, remove it from the pan. Boil the sauce and reduce to a thicker consistency. Tasts for seasoning and pour over chicken.

Tuesday, January 20, 2009

Viva La France: French Onion Soup


Who knew that a bunch of onions and a little broth could make such a wonderful and filling soup? Apparently the French did! Legend has it that King Louis XV created the recipe one night when he had nothing but onions, Champagne and broth in his fridge. Or so the story goes, royalty always wants to take the credit for one thing or another. Whether this story is true or not, the reality is people were poor and onions were plentiful. Soups were easy, cost effective and warm, both to the body and to the soul. It was the natural route to take.
I have played with many recipes for this soup, changing ingredients here or there. However, there is only one key element to this soup: the onions. The flavor of this soup comes mostly from how well you caramelize the onions. Caramelizing onions is a very slow and delicate process. It takes time and love but it is well worth the process. This was the first time that I used sweet onions instead of regular onions and I really found that the soup had a lot more flavor.
I opted to do a separate piece of whole grain toast with a bit of Parmesan cheese on it, instead of doing a crouton inside the soup. This way I can dip!


French Onion Soup

*Here is a huge hint for this soup. Stick your onions in the freezer for about an hour before making this soup. The cold will slow down the chemical reaction of the sulfuric acid and you will not shed one tear!*

4 Sweet Onions, Thinly Sliced
2 Cloves of Garlic, Finely Minced
3 Sprigs of Thyme, Removed From Stem
1/2 Cup Cognac
1/4 Cup Sherry
5 Cups of Beef Broth
Salt and Pepper to Taste
Olive Oil for Cooking
2 Slices of Gruyere Cheese

1. Pour oil in a large pot and turn to medium heat. (I prefer to saute the onions in a large saute pan first and transfer to my pot later. They cover more surface area that way and cook evenly and faster.)
2. Place sliced onions, garlic and thyme into pan and season with salt and pepper. You do not want them to cook too quickly. This entire process can take about 30 minutes just to get the flavor out of the onions. But I promise it will be worth it! They will be sweet and tender. Stir them about every 5 minutes to make sure that they are getting color evenly. If you see them starting to burn or get crispy, turn down the flame.

3. Once they have reached a nice medium brown color, pour in your Sherry and Cognac. This is the fun part, it will "flambe" but be careful. Once the flame stops add in your stock and cook slowly and gently at a low simmer. Taste your soup frequently. Sometimes it needs a bit more Cognac or Sherry to cut through the sweetness a bit. It all depends on your tastes.
4. Once the soup reaches a taste you are happy with, ladle some into an oven proof bowl or crock and top with Gruyere. Stick under broiler until cheese browns and bubbles.

Viva La France: Braised Short Ribs with Creamy Parmesan Polenta

Photobucket
As a culinary student majority of my education was based on French cuisine, food history and techniques. I fell in love with French food the first time that I made Tomato Concasse. Literally it means the process of removing the skin and seeds off of a tomato, we then turned it into a delicate tomato sauce with shallots, garlic and wine. The smell of butter and shallots quickly became my favorite smell in the world. And so my love with French food continued. For me the simpler the dish, the better. I fell in love with delicious roasts, simple stews and creamy soups. My French chef's always cooked with such emotion and love that it was contagious. They taught us everything from Duck Confit (duck slowly cooked in its own fat for a long period of time) to Pomme Frittes (delicious, delicate little shoestring fries). Figure friendly it was not, but hey I was in culinary school, I needed to taste and savour every bite!

The best French food funny enough, was originally peasant food. For instance, seafood was peasant food at one time. People tried to use what was fresh and available to them and especially in the region of Provence, seafood was readily available. Most of the time peasants did not get the favorable part of an animal and so they had to figure out ways to enjoy it and make it taste really good. Alas, short ribs enter the picture. At one point short ribs were so cheap butchers could not give them away! Even as recent as the early 1990's, no body wanted short ribs. They wanted filet Mignon, NY Strip, rib eye, but who would want short ribs. There were very few who understood the short rib...who would want a pathetic looking rib with a little bit of meat on it and tough meat at that? Well, what most people did not understand was that when you cook the meat for a long period of time that meat becomes tender and succulent. For home cooks it was too daunting and restaurant owners were not sure if their clientele was ready for this. It was not until the early 90's that a restaurant in New York started making braised short ribs and the prices for short ribs sky rocketed.
My short ribs were a combination of simple and bold flavors. I wanted to pair it with something that could absorb the sauce and polenta proved to be perfect for it. Believe it or not, polenta is actually eaten in Provence as well due to the proximity to Italy right across the Mediterranean.

So turn on some French music pour yourself a glass of Bourdeaux and enjoy.


Braised Short Ribs with Creamy Parmesan Polenta

3 Pounds of Beef Short Ribs
3 Stalks of Celery, cut into large chunks
4 Carrots, peeled and cut into large chunks
2 Large Onions, cut into large chunks
1 Whole Garlic Head, with the top removed
4 Sprigs of Rosemary
4 Sprigs of Thyme
Handful of Parsley Stems
1 Bay Leaf
2 Cups of Good Red Wine
1 Cup of Chicken Broth/Stock (if you have beef broth, go ahead and use it)
1 28 Oz Can of Tomato Puree
Salt and Pepper
Olive Oil


1. In a heavy pan, heat olive oil until it smokes.
2. Season short ribs generously with salt and pepper and gently add to the hot oil. Continue cooking until nicely browned on each side. *Please make sure that you take the time to do this and do not overcrowd the pan. The flavor will come from the caramalization of the meat.*
3. Remove the short ribs and lower the heat to medium. Add in all your vegetables.
4. Sautee until softened and slightly browned, about 10 minutes.
5. Turn up the heat and add in your wine. Carefully scrape the bottom of the pan making sure you pick up all the browned bits on the bottom. Let reduce by half.
6. Turn off the heat and place your short ribs in your crockpot. Add in your vegetables and wine on top. Cover with chicken or beef stock until fully submerged. Turn the crockpot on high and cook covered, for 3-4 hours until meat is tender and pulls away from the bone.
*If you are not doing this in a crockpot, you can do the same steps and finish it in the oven at 300 degrees for about 3-4 hours or until the meat is tender enough.*


7. Once you the meat is done, remove the meat and reduce the sauce until flavor concentrates a bit. Making sure to season as necessary. Skim the fat off the top and serve!


Creamy Parmesan Polenta

1 Cup of Instant Polenta
3 Cups of Chicken Stock
1/4 Cup of Parmesan Cheese
1/2 Cup of Half and Half

1. Let the chicken stock come to a boil.
2. Add in the polenta and stir with a wooden spoon until there are no lumps, about 5 minutes.
3. Add in parmesan cheese and half and hlaf. Stir to combine and serve.

Monday, January 19, 2009

Influenza Sucks!

Well the flu has struck me and it struck me bad! I tried to avoid it, but it managed to creep its way in! I got sick Wednesday and have not been myself ever since! Turns out it's a flu with a sinus infection! Fabulous!
I spent my days laying on the couch, watching my usual, Food Network. I'm not going to lie, it was pretty nice. However, it drove me nuts not to cook! So today I went crazy and cooked a feast! I promise I will be back tomorrow with plenty of recipes and pictures. It's Viva La France week! Some of my all time favorite soups, meals and side dishes will be served up French style!

Wednesday, January 14, 2009

Rosemary Chicken and Roasted Potatoes

Photobucket

Sometimes you need something simple, really simple. Something that is comforting and delicious. For me it was always roast chicken. No matter what age I was, roast chicken always did it for me. For starters, it will always fill up your home with the most delicious smells! I always told my friends that if they were expecting a boy to come over and they wanted to impress them...just stick a chicken in the oven and they will be floored!

A few weeks ago, as I was skimming Peter's Blog, I noticed the Greek chicken he did over potatoes. I was inspired! I used to do this all the time because I didn't have a roasting pan, so I just made a one dish meal and made my life easy.

My in-laws were coming over and because of traffic I only had an hour to make dinner. This was perfect. I threw a bunch of Yukon golds on the bottom of the pan then placed the chicken on top. The skin on the chicken was crispy and inside it was so very tender! The potatos were probablly some of the best I had had from the oven! And my house smelled like goodness for the next few days! I paired with a nice salad of tomatoes, cucumbers and red onions (my favorite) and toasted whole wheat bread. Unfortunately, the in-laws could not make it because of the bad weather. But my fiance' and I feasted like kings, he even gnawed on the bone a little...

Rosemary Chicken and Roasted Potatoes

1 Whole Chicken
5 Pounds of Yukon Gold Potatoes, Cut Into Bite-Size Pieces
5 Cloves of Garlic, (Mince 4 of Them)
5 Sprigs of Rosemary (4 Sprigs Chopped)
1/4 cup of olive oil
1/2 a lemon, juiced
1 Tbsp of Garlic Powder
Salt and Pepper

Preheat Oven to 450-degrees

1. Combine the olive oil, lemon juice, seasonings, and chopped rosemary.
2. Place the potatoes on the bottom of a pan with sides and toss it in half the olive oil mixture. Add minced garlic to the potatoes.
3. Place chicken directly on top of the potatos and rub the oil mixture on it. Then sprinkle with garlic powder. Fill cavity with remaining garlic clove, rosemary sprig and the juiced lemon.
4. Place in the oven for 35-45 minutes, depending on the size of the chicken, or until juices run clear.
5. Remove chicken from the pan and pour access juices from the cavity onto the potatos, stir potatoes gently to combine with all the juices. *My potatoes required just a bit longer cooking than the chicken. So at this point I stuck them back into the oven for about 15 minutes until they were soft on the inside.*


These potatoes really were incredible! It's amazing how sweet and tangy they were at the same time! I will definitley be going back to this next time I need a quick fix!

Tuesday, January 13, 2009

Waffle Torte

Photobucket
You want to talk about simplicity? This is it! This is one of my all time favorite cakes. My best friend, Marina, salivates when she hears this cake. I swear if she could, she would make the inside of her wedding cake out of this!
Delicious, doesn't begin to describe this cake! Only 5 simple ingredients are used and they create something out of this world!

One of them is wafers. Not those sad looking vanilla wafers. Think more like the wafers that you are given in church by the priest. You know that little thin cookie type thing they put on your tongue? Now imagine it a bit thicker and bigger.
Photobucket
If you look around your Russian or Polish deli's you will find them.
The other main ingredient is sweetened condensed milk. This alone can be a dessert for me. But you see we aren't done yet. This cake calls for the milk to be boiled while it's in the can for 3 hours. The end result is caramelized sweetened condensed milk! Basically, what the Spanish call, dulce de leche.
I promise this cake will be the easiest and most amazing treat you can make!

Waffle Torte

1 Package of Wafers
3 Cans of Sweetened Condensed Milk
1/2 a Stick of Butter, Melted
1 1/4 Cups of Walnuts, Ground
1/4 Cup of Cognac or Brandy


1. Take the labels off of the cans of condensed milk and boil completely submerged in water, for 3 hours. If water evaporates, add more to ensure that they are completely covered the whole time.
2. Cool the cans under cold, running water until they are cool to the touch.
3. Open them...CAREFULLY, there is a lot of pressure in there so just make sure you cool them, or else they will pop when opening. And trust me on this one, hot sugary, condensed milk is not pleasent on the skin.
4. Place the butter in the bowl first. Then add in your condensed milk, carefully scraping out all the goodness out of the cans.
5. Add in your cognac and 1 cup of nuts. Mix to combine.
6. Begin building your layers with the wafers. Place one wafer down on smear on about 5-6 oz of condensed milk on the wafer. Top with another and continue until complete. Sprinkle with the remaining 1/4 cup walnuts and let rest for at least 1 hour. Just enough for the filling to seep through.

My cat was a big fan of the cake!
Photobucket

Photobucket

*I would love to hear everyone's feedback on this cake. For all you culinary adventurers, please try and make this and let me know what you thought!*

Russian Mini Meatloafs...Kinda..."Kotleti"

Photobucket

This ladies and gentleman I present to you is the Russian meatloaf...or maybe the Russian "mama-burger"...OK what it really is, is ground meat combined with onions and seasoning, fried to perfection to create little patties of goodness. Moist and delicious, this recipe definitely takes me back to eating at my paternal grandmother's house as a kid. There, no ounce of fat was spared. My grandmother would fry them in butter and sunflower oil, until they were perfectly brown and delicious. My mother on the other hand, used ground chicken or turkey instead of beef and fried them in as little sunflower oil as possible. I grew up and I made them the way my mother used to because that's the only way I knew how. Don't get me wrong they were delicious, just not traditional. I wouldn't dare try anyone else's "kotleti" because they weren't my mom's. That is until last year. My best friend, Marina, calls me up and tells me that her mother-in-law Vera, taught her how to make perfect "kotleti". She says,
"You know Mila, real "kotleti" not the kind you make."
Naturally, I had to try these, she down right offended me!
I did try them and they were AMAZING! Just like babushka (grandma) used to make! Fattening little suckers they are, but hey just one won't hurt.
This is the only recipe I ever use to make "kotleti" (thanks Vera!) I just try and pair it up with something healthy and eat just one (sometimes). The only thing I did change was that I finish them up in the oven instead of frying them on the pan the entire time. It saves me time and lightens up the fat. This time, I served it up a nice healthy side of buckwheat, a Russian staple, and a light salad of tomato, cucumber and red onion. Enjoy!

Kotleti
5 pounds of ground beef (I used 85% lean and they turned out great)
2 onions, pureed in a food processor until finely minced
3 pieces of bread, soaked in water
1 egg
salt and pepper to taste


1. Combine all ingredients well by hand. Make sure you squeeze out the water from the bread so that your force meat won't be soggy.
2. Form little oval patties with your hands. Try not to work them too much, you want them to remain nice and fluffy.
3. Fry them up on each side until they are a nice golden brown. Lay them out on paper towels to suck up the oil a bit.
Photobucket
4. Pour all the oil out of the pan and finish them up in a 500 degree oven for about 5-7 minutes, until juices run clear.

Enjoy!

Cutting Carrots into Matchsticks

1. I don't think I have to preach this anymore, but please make sure your knife is sharp.
2. Peel your carrots and cut them in half so you have the root side on one end and the stem on the other. This is done so that the next step is easier and the carrots are shorter.
3. Slice your carrot by standing it up. Then carefully with your SHARP knife, make slices.
Photobucket
4.Next cut those slices into matchsticks.
Photobucket
There perfect matchsticks.
Photobucket
If making dice, then just flip those around and dice them up.

Russian Pilaf, "Plov"


Every once in awhile, a dish comes along that is just perfect. In fact, it would be disrespectful to the generations before to change it. France has duck confit, Italy has risotto, the US has BBQ and Uzbekistan has "plov". Whether you call it, pilaf, polow, pulao, the basic idea remains the same, a simple rice dish with complex flavors and old tradition.

Plov is actually the Russian pronounciation of the word common to all of the Caucas, Turkmenia, Kazakhstan, Uzbekistan, Iran, Afghanistan and India. "Plov" seems to be first seen in Samarkand when Alexander the Great of Macedonia asked his cooks to create a dish that could be used for him to entertain "company". "Plov" recipes were handed down not from parent to child but instead from merchant to merchant, from traveler to traveler on the Great Silk Road. Although several changes were made due to local available ingredients and tastes, it has remained in some shape or form as a popular dish among all eastern cultures from China to Azerbaijan.

Today "plov" is known as the most popular and common dish to Uzbekistan. Natives of this country claim that there are more than 50 varities of this dish. It is used when a friend comes over, as the main dish at a wedding and even funerals. Some use different meats, nuts, dried fruits, spice etc, but the technique remains the same. However, the classical "plov" recipe remains the same for over 1000 years. There are certain traditions that must remain the same when cooking a classic "plov".

1. You have to use a heavy bottomed pot which they call a "kazan" to cook the "plov". Cast-iron works the best. "Plov" cooks on a very high temperature, therefore you need a something that is going to be a good insulator of heat and cast iron proves to be one of the best.
2. Rice must be washed throughly and preferably steeped in water before adding it to the "kazan".
3. Plenty of carrots must be used. In fact, they even state that the carrots to use are light orange in color not the deep orange-red that I have here. *Unfortunately, that's all I could find and my "plov" still tastes amazing, so I would not worry too much about it.*

4.The rice is VERY important. The combination of the rice and the cooking method are what give "plov" its distinct quality. The rice seperates perfectly from one grain to the next and NEVER clumps! Clumping is pretty much the tell tale sign that the "plov" was a failure. There is a certain rice that is used native to the area. The closest that I found was "Enriched Parboiled Long Grain Rice". It is easy to find and works best for this dish.

5. Lastly, only a man cooks the "plov". This is the one rule that I must break. I believe traditionally it was because the "kazans" were so heavy that only men would be able to work with them or prehaps it was a very sexist society. Either way, I break this rule.


One thing I must mention, this is not a dish that I recommend making on a whim. It is time intensive and a bit labor intensive. It requires a LOT of carrots cut into matchsticks by hand. For this reason, I prepare everything the night before and all my cutting is done for me once I am ready to cook. I am always excited to cook this dish, ALWAYS. It is one of those dishes that for me is very therapeutic. It does take some time, but the end result is something that you will be proud of. As simple as it is, the end product will reflect the hard work and time you put into the dish and I promise people will be impressed.

I will also admit that I learned the actual recipe very recently. About 3 months ago to be exact. I had attempted making this dish many times, cooking it the way a culinary graduate would, in accordance to French culinary laws. However, this could not have been farther away from the actual recipe and technique. I used brown basmati rice to make it healthier, which we know now is not right. I cooked it for only an hour instead of the necessary 3. My best friend, Marina, would always say to me,
"My mother-in-law says that it takes all day to prepare this dish."
To that I would respond with,
"Oh that's because she is slow, my culinary skills and techniques allow me to do it in less than half the time."
Well I was wrong! My rice was never the way it should be. When I read about the way the rice should fall from one grain to the next , I knew I was in the wrong.
It wasn't until one night when I was at my friend Kate's house that I saw exactly what I needed to do. She explained the whole process to me as was told to her by an Uzbek (and Uzbekistan native). Wow! It opened my eyes to a whole new method. Completely different than any I have ever seen, but it worked perfectly.

And so I pass this on to you folks, who will hopefully take the time to cook this dish and taste why it has withstood 1000's of years and remained unchanged.

Plov

3 pounds beef stew meat, cut into bite-size pieces
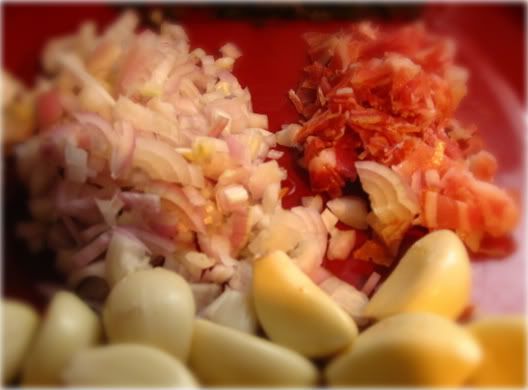
*Traditionally lamb or mutton was used, however I really dislike lamb, so I use beef.*
2 large onions, thinly sliced
8-10 large carrots, cut into matchsticks
3 cups of Enriched Parboiled Long Grain Rice, steeped in water
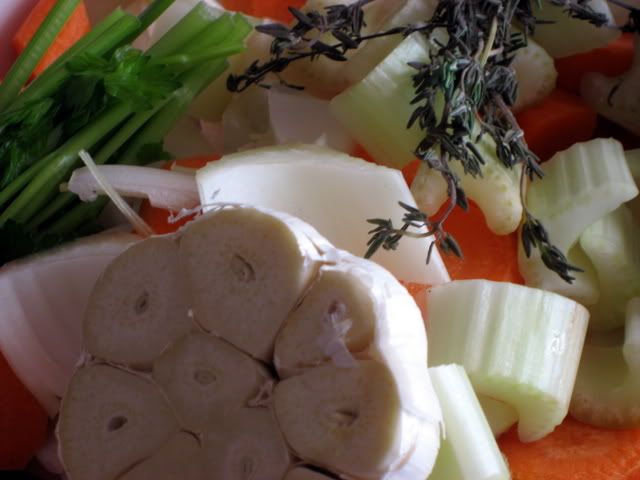
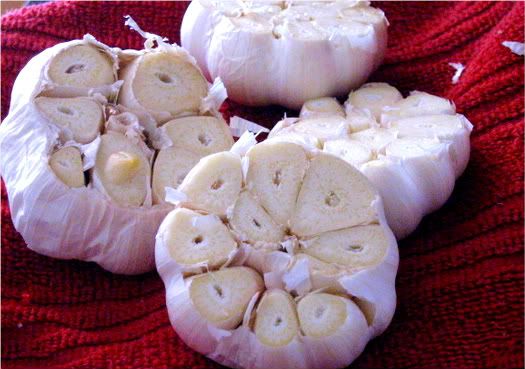
3-4 heads of garlic, with tops cut off
1 tablespoon of cumin
1 teaspoon of black peppercorns
salt to taste
vegetable oil for frying
*I usually use olive oil for general cooking. However, for this, you need the oil to have a high smoke point (the point that it burns) and olive oil has a fairly low one. Vegetable oil has a high one, so you can get the pan screaming hot before your oil begins to burn.*

1. In a cast-iron pot, pour in about 1/2 an inch of oil, be generous with it. Turn up the heat all the way. When you see your pan smoking, add your meat. *Do not over crowd your pot. If you happen to do so and you accumulate a large amount of liquid from the meat, pour out the liquid and reserve it for later, when you add water to the carrots. This way your meat will be able to brown nicely.*
Photobucket
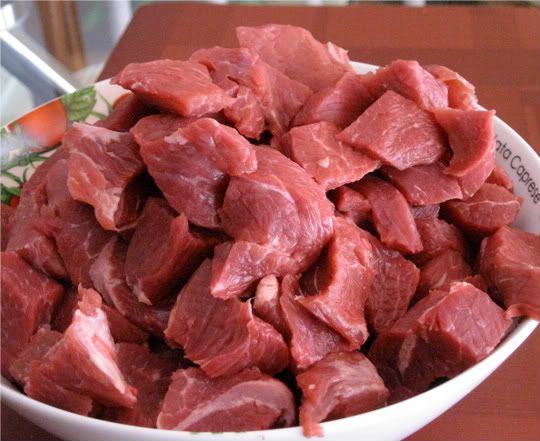
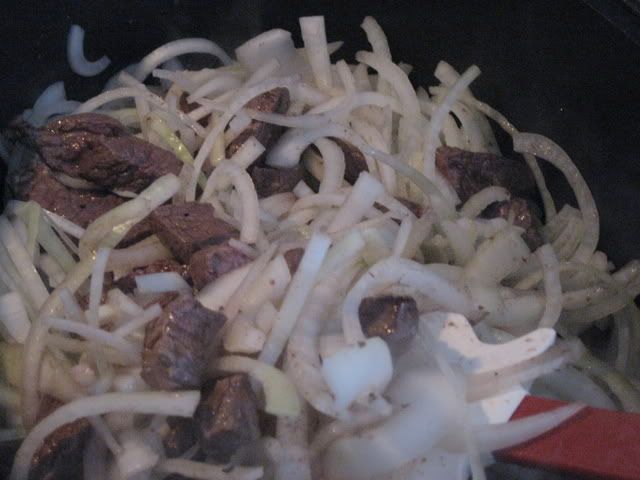
2. Once your beef has browned on all sides, about 10 minutes, add in your sliced onions.
Photobucket
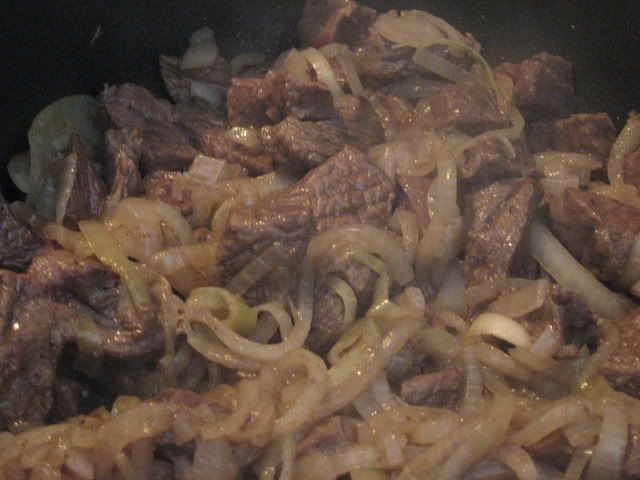
3.Saute' for 15 minutes, until the onions are nicely browned.
Photobucket
4. At this point add in your matchstick carrots and saute for about 15 minutes. *Here I have demonstrated how to properly and quickly cut your carrots.*
Photobucket
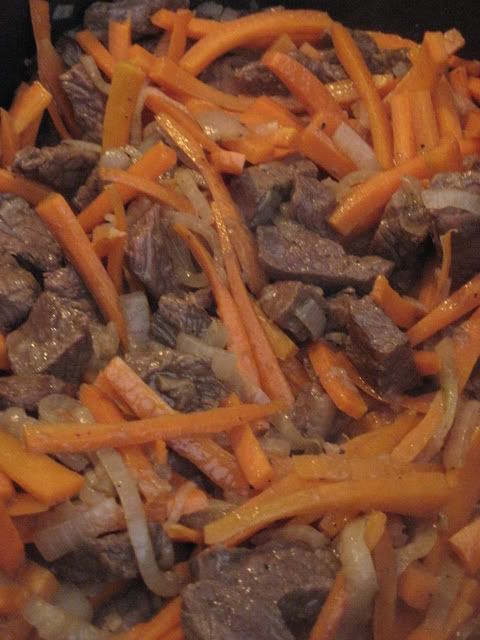
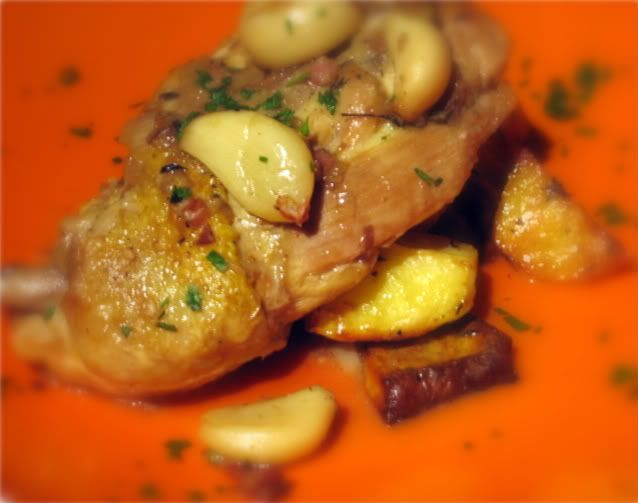
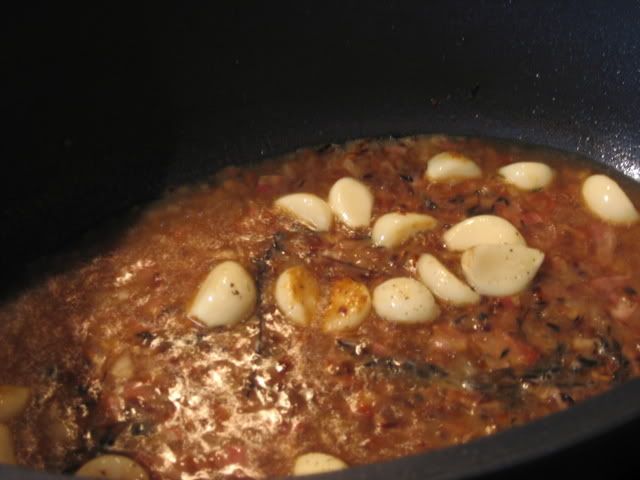
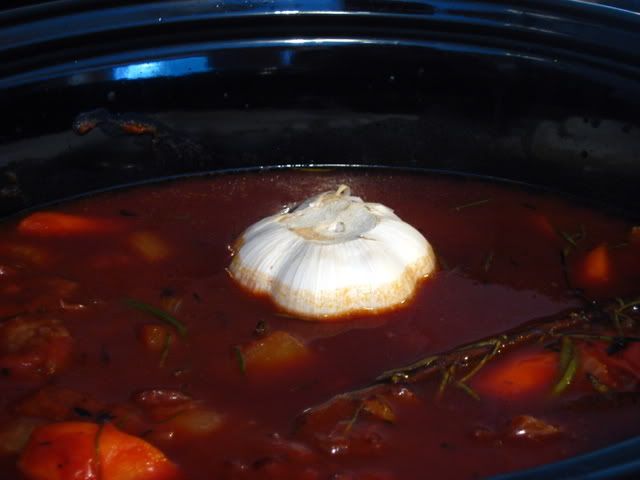
5. Now add in your garlic and nestle it into the mixture. Just cut off the tops and take some of the loose "paper" off the garlic.
Photobucket
Take BOILING water and add it to your garlic, carrots, meat and onions. Only add enough water to just cover the mixture. Add in your herbs and spices, taste the liquid and ensure that there is enough salt and spice in there to compensate for the rice you will be putting in later. NOW you may turn your heat down to low. *You want to use boiling water because otherwise you would stop the cooking time. At this time, if you can also add any leftover liquid from the meat.*Photobucket
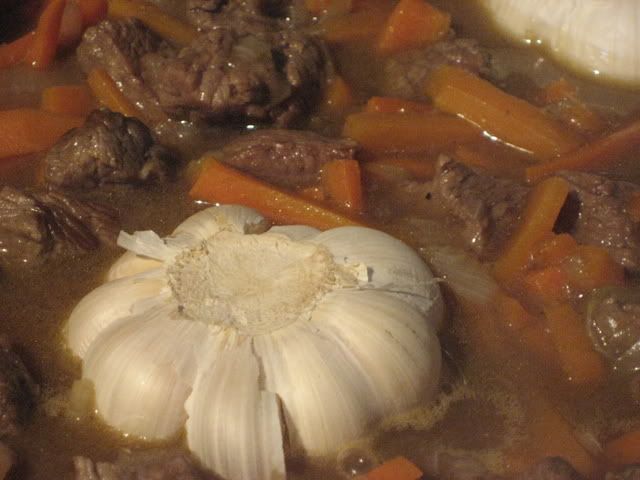
GO AWAY. PLEASE PLEASE Please whatever you do DO NOT STIR! You will disrupt the wonderful magic that is about to happen! Go talk on the phone, watch half a movie, drink some wine...whatever you want...just do not touch this for 45 minutes.
6.Once this time has passed crank up the heat. Remember that rice you had steeping in the water? Now is the time to drain it and prepare for its final resting place. Once drained, lay the rice CAREFULLY over your carrot, meat and onion mixture. Pretend you are gently "blanketing" the mixture with your rice. Again, take BOILING water and SLOWLY cover the rice just about 1/2 of an inch above the rice. See all that beautiful brown goodness come up to the top? That's your flavor right there, that's what you did all that work for. Now just get the rice done and you will have a complete success.
Photobucket
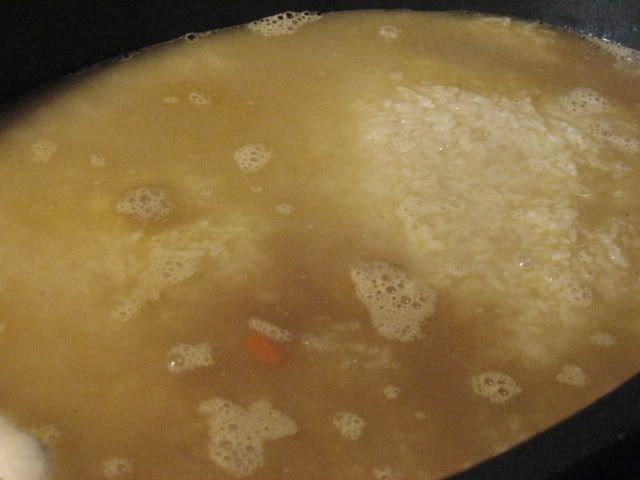
Let the rice cook on HIGH heat until there is no more liquid. If you see liquid still bubbling up from the top, it isn't done. If you see liquid bubbling up at the bottom, it isn't done. Only when it is completely dry is it done.

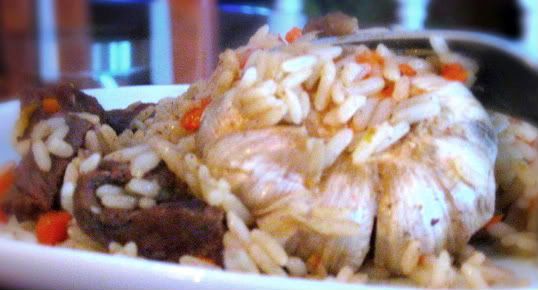
Once it is completely dry, turn off the heat and cover with the lid for about 30-60 minutes. Only after this time passes can you mix the mixture. Serve with garlic cloves on top.
And there you have it!
Photobucket

Monday, January 12, 2009

From Russia with Food...

I decided that I am going to create a different theme each week for my recipes. So this week it's my favorite of Russian foods! Traditionally, Russian cuisine used hearty ingredients to give people energy during the long winters. Many of the staple foods include whole grains, potatoes, eggs, pickled vegetables, different smoked meats, including a wide array of sausages and smoked fish. People think of Russian food and think of 3 things: Vodka, Borscht and Herring. Well there is quite a bit more to it than that.

Pickling, canning and preserving has been a staple of the Russian way of life for generations. Ordinarily people would pickle, cure and salt their foods to preserve them for the winter. My grandmother and mother would spend days canning everything from jams to pickled watermelon! (Now, before you cringe, pickled watermelon is actually quite delicious. You just have to eat it with your eyes closed because your eyes cannot believe that watermelon and salty would go together, but it does and it's awesome!)
I grew up in Moldova, a country next to Romania, where we had plenty of seasonal fruits, vegetables and great wine, at least that's what the area was known for. The one beauty of growing up there was that everything that I ate was always in its peak season, so it always tasted as it should. When I tasted a tomato in Chicago for the first time, I didn't know what it was. It just did not have the same aroma or flavor. In fact, it took me quite some time to get used to the taste of meat and fresh produce here.

Russian recipes have stayed the same for generations. There have definitely been times when I wanted to lighten up recipes and change them. However, it never turned out quite right. I realized that although Russian food can be very fattening, (for example, one of the best things that Russians eat is something called "salo" which is the equivalent of Italian "lardo". Basically it is bacon, but with a little less meat and a bit more fat...mmmm I can almost feel the pounds piling up on my thighs!) sometimes a little bit is all you need. Russian food, is ultimate comfort food and we all need a little bit of that fromt time to time. Originally food was meant to keep energy and spirits up in the winter and that it certainly does!

It has come to my understanding that most people do not know the vast number of countries that influence this part of the world. When the Mongols took over they left their imprint on the region with dumplings known as "pelmeni", noodles and smoked sturgeon. When Peter the Great took over he introduced trade with France and therefore a bit of classical French cuisine and preparation techniques were evident, especially with royalty. Elegant desserts and elaborate buffets were all part of this time era and still remain as a cultural staple. Tea was introduced in the 18th century by the China trade. Southern Russia, which is located next to the Caspian Sea, is the producer of some of the world's greatest caviar, Osetra. Ukraine (where my fiance' is from) popularized breads and grains and introduced the first recipe of Borscht, the traditional Russian beet soup. Lastly and my personal favorite is the Caucus region. Countries like Georgia and Armenia, introduced spices such as saffron, pepper, cumin, and coriander and my favorite meat of all, Shashlyk: large cuts of meat cooked on an open flame over natural wood and served with fresh onions.

Most Russian food I love for its simplicity of flavors and preparation methods. It's a shame that people do not know about Russian culture or its cuisine because I gotta tell you, once the vodka starts pouring and the food starts coming, the party isn't ending!

Friday, January 9, 2009

Persian Lentil and Tomato Soup


Most Chicagoans know of this wonderful Persian restaurant called "Reza's". Russians looove this Middle-Eastern cuisine. Partially because of the influence of the Georgians and the Armenians. Besides, what can be bad about char grilled meat and fragrant basmati rice?

For as long as I can remember my family went to Reza's. I always had this gitty feeling when I knew we were going to there. I would day dream about it in school and look forward to it all day. The food was always great, inexpensive and filling. They have HUGE portions...HUGE! Mostly everyone at our table always left most of the meal on their plates...except my dad, my uncle and myself, we put away the entire meal! My mom warned me each time to stop, that I will feel sick ...but I never listened and every time I would slouch on the chair, slowly making my way under the table to take a much-needed nap, growning from my full tummy. My mom would say, "Why would you do that? Look at your stomach, look!! This is more food than you have eaten all month! You cannot do this to yourself." I would look up at her, with a miserable smile and say, "But once I start, I cannot stop. I have to eat it all. How would dad and my uncle look at me if I didn't eat it all?" My mom would throw her hands in the air and say that one day I would learn. I can still put away an entire plate of food today but I choose not to and instead take it home. To this day I still crave to go there and get excited about eating their food.

I have duplicated almost every recipe they have at the restaurant, except one. Their soup. It's this delicious lentil and tomato soup that I absolutely love. It's totally vegetarian and has a ton of flavor in it. It has that unique combination of eccentric spices known to the middle eastern world.

I made it yesterday in an attempt to continue my vegetarian style diet. (I say style, because I am eating meat, just not every day.) It was almost identical to the one in Reza's. My fiance' was very against tasting it because I told him that it was vegetarian. I put it out for him when I went upstairs to blog last night. I came down...the bowl was licked clean!
"I liked, even better than Reza's!" He said.
Ahhh music to my ears, my recipe is better than Reza's brilliant!

I based it off of a recipe I found on recipezaar.com, funny enough a woman was looking for the same soup recipe. The recipe definitely needed a bit of tweaking. I added a lot of my own spices that I know are traditionally used in Persian and middle eastern cuisine in general. It was filling and absolutely delicious!
I placed a dollop of middle eastern yogurt on top and it finished it of nicely.

*You can find the original recipe here *


Persian Lentil and Tomato Soup


1 cup lentils, rinsed
7 cups vegetable stock (I used Trader Joes, which was very flavorful)
1 tablespoon olive oil
2 medium onions, chopped
4 garlic cloves, crushed
2 cups stewed tomatoes, crushed
2 teaspoons salt
1 bunch of parsley, finely chopped
1/2 teaspoon pepper
1/4 teaspoon cayenne
2 tsp sumac
3 tsp 7-spice
1/4 cup brown basmati rice, uncooked
juice of 1 lemon

*If you have never seen sumac, I recommend that you try using it in all your middle eastern recipes. It is regularly used in that region of the world. It has a tart flavor to it and was originally used in food before the Romans introduced lemons. It goes well with chicken, beef, hummus almost anything. In fact, you will usually see it sitting on tables next to the salt in pepper in most good middle eastern restaurants. 7-Spice is also very popular and frequently used. It's a spice blend with cumin, ground coriander, paprika, nutmeg, cinnamon and cardamon. It really gives that middle eastern flare to the dish.*


1. Add lentils to stock and bring up to a boil. Cover and continue cooking on medium low for 25 minutes.
2. Sautee onions and garlic together and let them sweat. You do not want any color.
3. Add tomatoes, parsley and all seasoning and cook for 5 minutes.
4. Add onion mixture and rice to the lentils and stock. Turn down the heat and let it cook for about 25-30 minutes on medium heat, until the lentils and rice are tender. At this point, add lemon juice.
5. Pour into a bowl and add a dollop of middle eastern yogurt called "Labne".


*I think next time I do this dish I may do it a bit differently. It came out a bit chunky which is OK, but I am going to puree the tomatoes and onions next time and then add it to the soup. The color actually looks nicer that way and you get a more homogeneous consistency.*

Thursday, January 8, 2009

Thai Chicken Salad


I never liked those traditional chicken salads. They always were drowning in mayo and the chicken never had any flavor because it was poached. Yuck! However, I was so impressed with how well the flavors combined in my crab cakes, I decided to try something like this with chicken salad. It was AMAZING! So flavorful and fresh! My fiance' and I practically ate the whole thing with pita chips. I barely put any mayo in it so it really wasn't very bad for me. I still have some Greek chicken left over, so I just took the skin off of the chicken breast and used that.

Now, there is one little pain in the butt about this salad: the veggies must be cut really small. This is where your knife skills come in really handy. I came up with a few easy ways to chop the vegetables to make them small and most importantly get it done fast!

*Clearly you can tell from this blog that I am no longer in my vegetarian mode. However, I will try to make this dish with firm tofu next time. The chicken really didn't give it that much flavor, more texture if anything. Plus, the protein in tofu is much better!*


Thai Chicken Salad

1 chicken breast (grilled, leftover, rotisserie, poached etc)
1/2 red onion, small dice
1 small red pepper, small dice
1 small yellow pepper, small dice
1 handful cilantro, finely chopped
1 tablespoon soy sauce
1/2 teaspoon fish sauce
1/4 teaspoon chili garlic paste
2 tablespoons mayonnaise
salt and pepper to taste


1. Chop up all your veggies.
Here is the best way to chop any type of pepper.
-Make sure that you flatten out the pepper with the back of your knife. The flatter it is, the easier it will be to make nice thin

-Slice nice thin strips.

-Turn the strips the other way and cut into dice.

There! Now we can move onto step 2.
2. Chop your chicken finely. Slice it in half first so that it is thin and then repeat the same steps as above to get the chicken small.
3. Combine all ingredients in a bowl.
4. Season to taste and serve with your favorite roll, chips or crackers!

*See this stuff is good even our kitty Mika wants some :) *

Barefoot Bloggers: Banana Sour Cream Pancakes


Alright...I will admit it...I am a procrastinator. I've been bad...very bad and very busy and therefore waited till the very last minute to post my pancakes. I will admit that I actually made them for dinner and we just munched on them. But my fiance' will be having them for breakfast tomorrow which so that counts right?
As all of Ina's recipes are, this one was very good. I did however change one thing. I did not like the whole idea of just placing the bananas on the pancake while they cooked. So I decided to do a more gourmet version of this pancake. My take is Banana Fosters Sour Cream Pancakes. I took some sugar, butter, diced up bananas, Cognac and voila, you have pancakes that will make anyone happy. Now I completely understand that you would not want to serve this to your children, I promise the intention of this blog is not to booze up the kiddies. If serving this to kids, just take out the Cognac it will taste just as fabulous!

So here it is... very first Barefoot Bloggers post...I hope I made Ina proud!


Banana Sour Cream Pancakes

1 1/2 cups flour
3 tablespoons sugar
2 teaspoons baking powder
1 1/2 teaspoons kosher salt
1/2 cup sour cream
3/4 cup plus 1 tablespoon milk
2 extra-large eggs
1 teaspoon pure vanilla extract
1 teaspoon grated lemon zest
Unsalted butter

Sift together the flour, sugar, baking powder, and salt. In a separate bowl, whisk together the sour cream, milk, eggs, vanilla, and lemon zest. Add the wet ingredients to the dry ones, mixing only until combined.

Melt 1 tablespoon of butter in a large skillet over medium-low heat until it bubbles. Ladle the pancake batter into the pan to make 3 or 4 pancakes. Cook for 2 to 3 minutes, until bubbles appear on top and the underside is nicely browned.

Flip the pancakes and then cook for another minute until browned. Wipe out the pan with a paper towel, add more butter to the pan, and continue cooking pancakes until all the batter is used.

Banana's Foster Topping

2 ripe bananas, diced
1 stick butter
3 tablespoons sugar
1/4 cup Cognac
juice of 1/2 a lemon
1/2 a cup pecans, crushed


1. Place butter and sugar in saute pan and let it dissolve on medium heat.
2. Add bananas and cook for 2 minutes.
3. Add Cognac...if you are feeling a bit adventureous or want to impress guests go ahead and flambe: meaning tilt the pan to the flame a bit and your Cognac will cathch on fire. I promise this is sure to be a hit with everyone.
4. Turn off heat and add lemon juice.
5. Spoon over pancakes and add pecans.